A Simplified Guide to adding a Meeting Room Resource Calendar to Google Workspace.
Last April, Google released a series of updates to Google Workspace, including a new system for creating and organizing Meeting Room Resources. While this solves a number of problems, especially for larger organizations, it makes the whole process of setting up a resource mailbox much more complicated.
In this guide, we’ll try to break down that process and reduce it to a simple set of easy-to-follow instructions.
Getting Started
From the Official website:
In addition to scheduling events in Google Calendar, Google Workspace users in your organization can book resources that people share. The most common example is a meeting room. Other examples might include projectors, company fleet cars, guest offices, recreation equipment, or any other resource people might schedule a time to use.
Admin privileges
To manage calendar resources, you need an administrator role with calendar resource privileges. The Super Admin pre-built role has calendar resource privileges. Other roles and custom roles no longer have sufficient permissions to write to a calendar. Therefore, Service Users need to have the Super Admin role in Google Workspace.
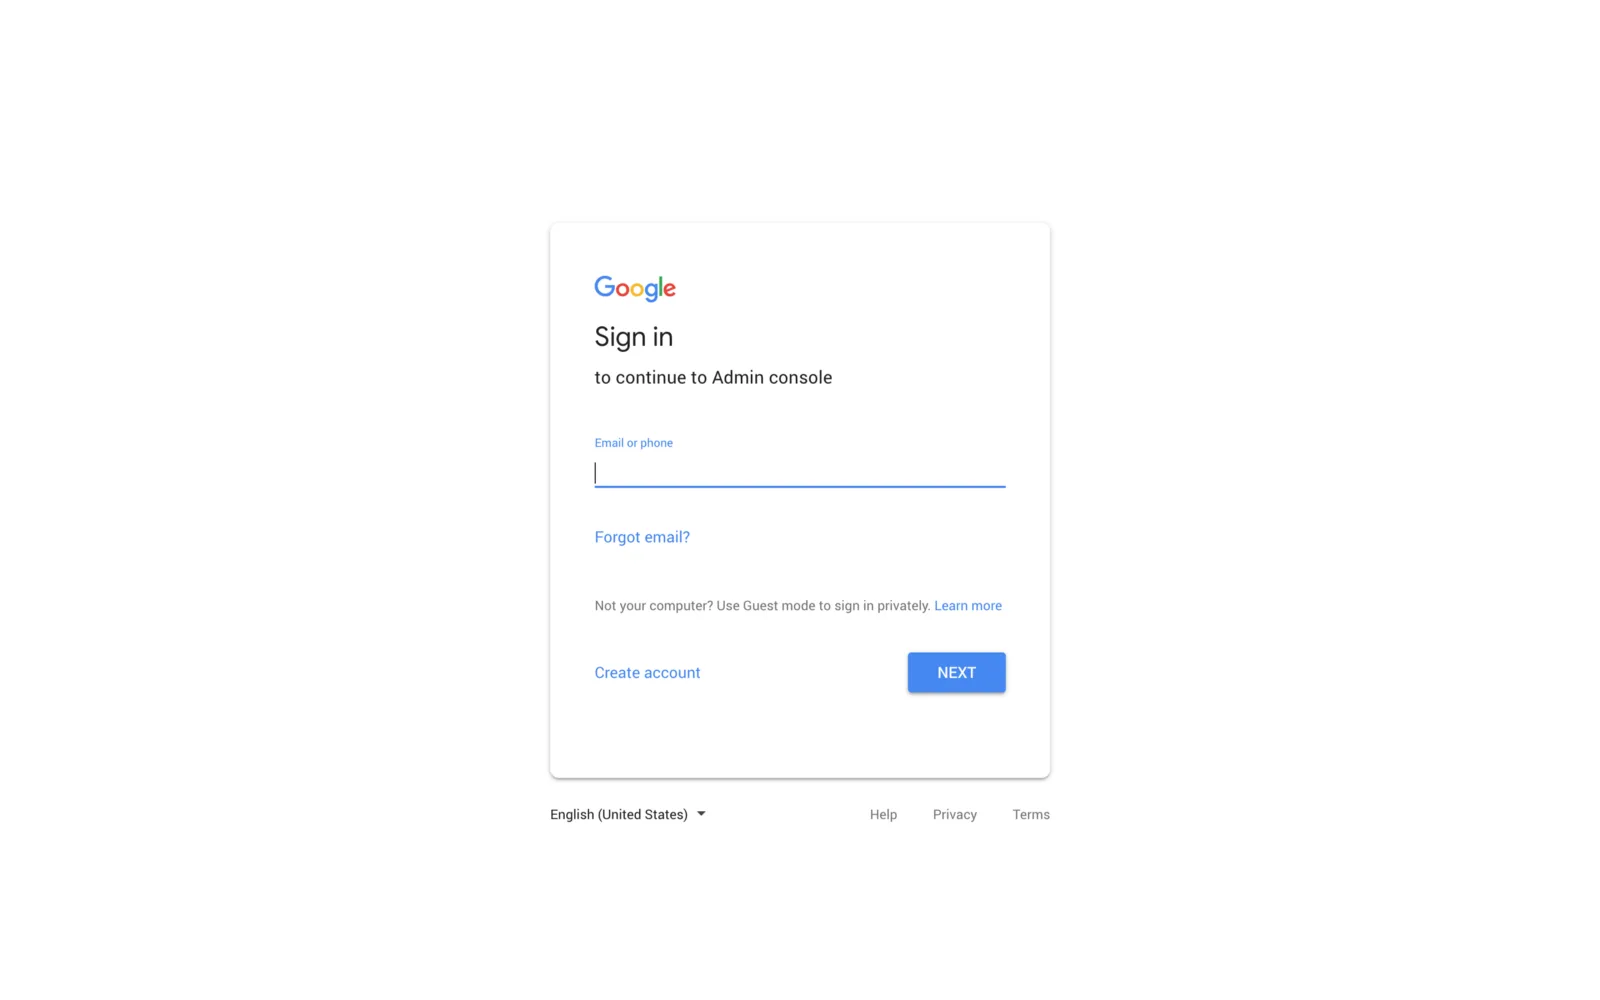
Sign into your Google Workspace Admin Console
Your admin console is located at: https://admin.google.com/
Add a building in the Admin console
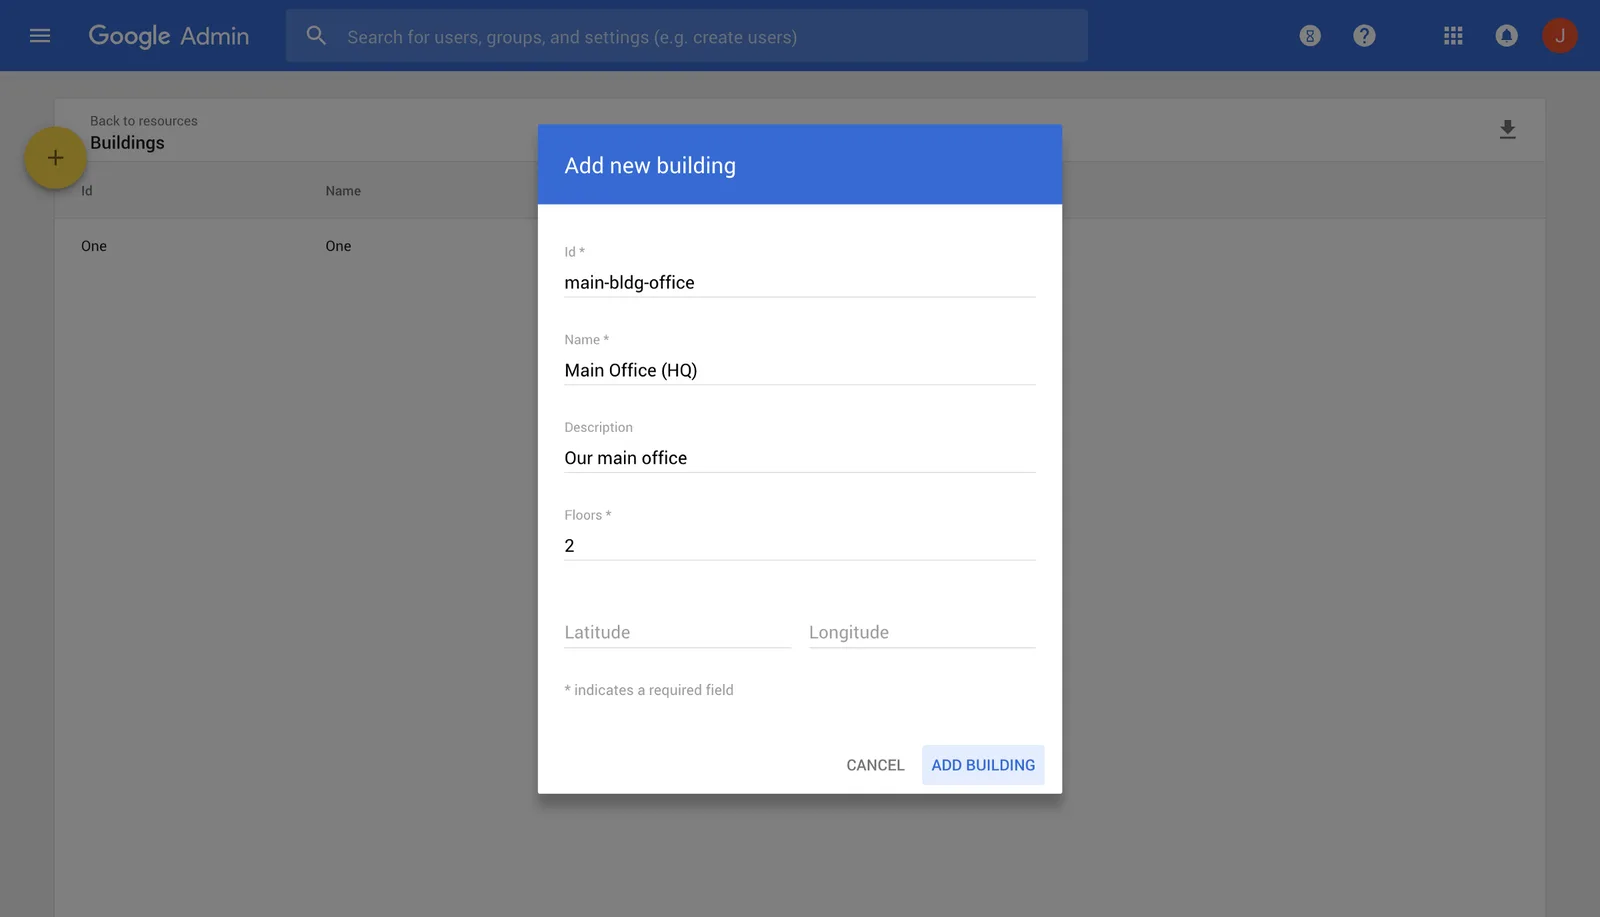
In the new version of Google Workspace, each meeting room resource must belong to a building. So your first task will be to create a building for your organization.
You can do this from the **Buildings Page: https://admin.google.com/u/0/ac/calendarresources/buildings**
(Apps > Google Workspace > Calendar > Resources > Manage Buildings > Add)
Add a Resource Calendar
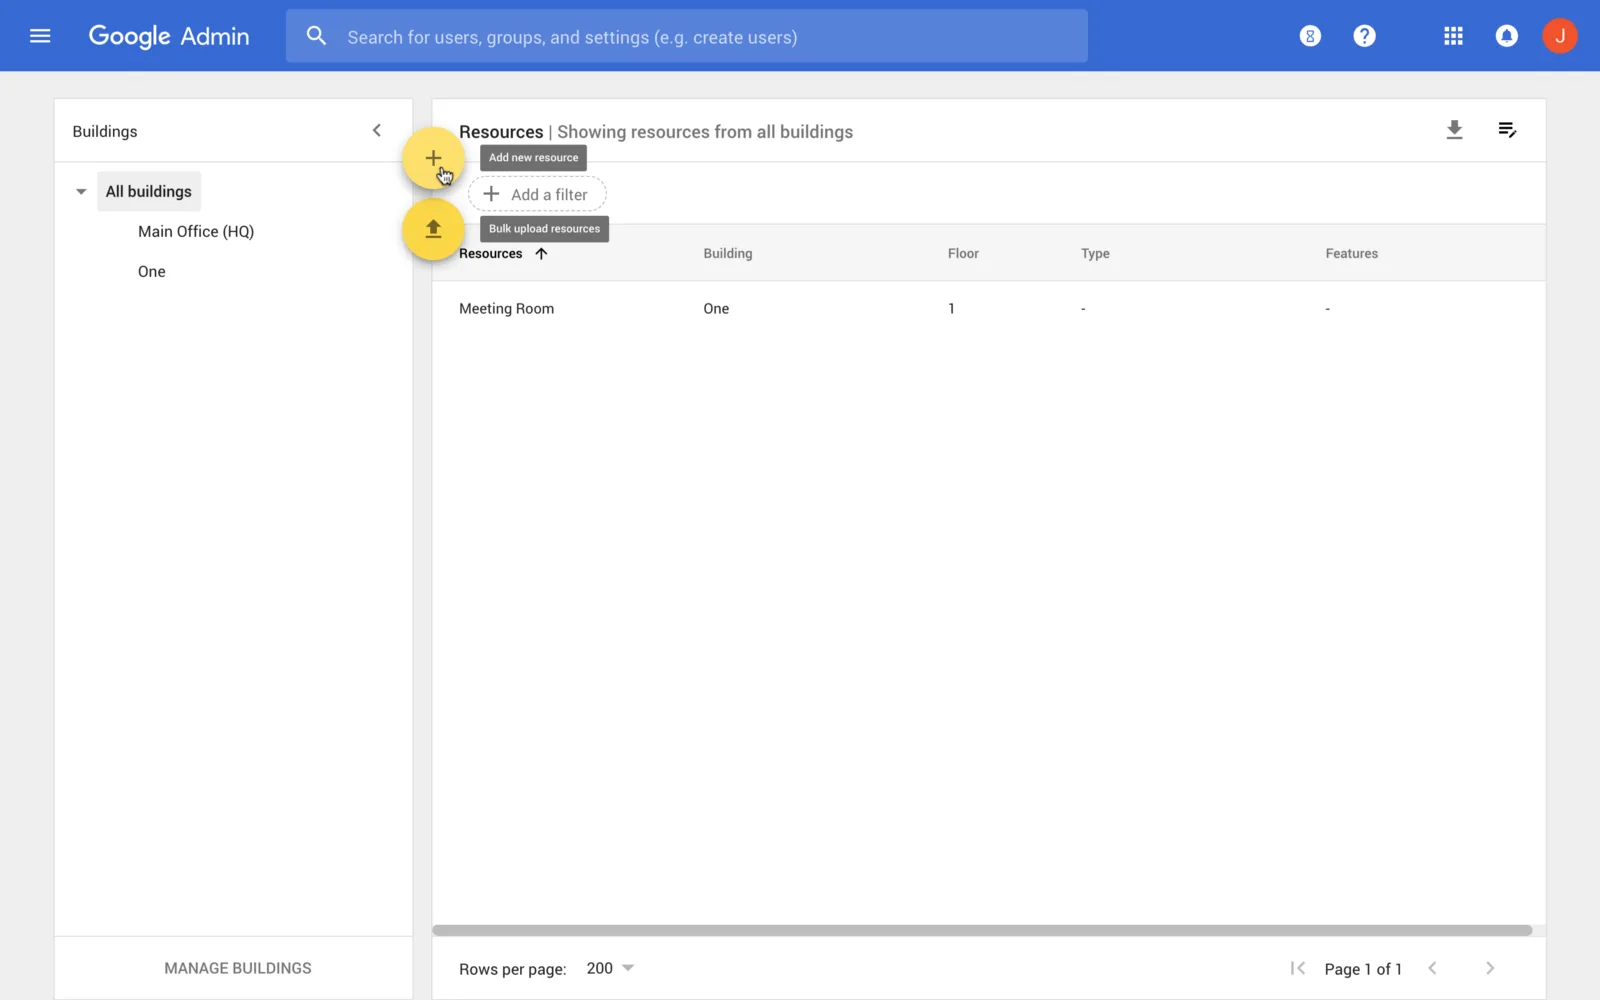
Next, you’ll want to add a Resource Calendar to your newly-created building.
Head over to https://admin.google.com/u/0/ac/calendarresources/resources and click **Add a New Resource.
(Apps > Google Workspace > Calendar > Resources > Add > Add Resources)**
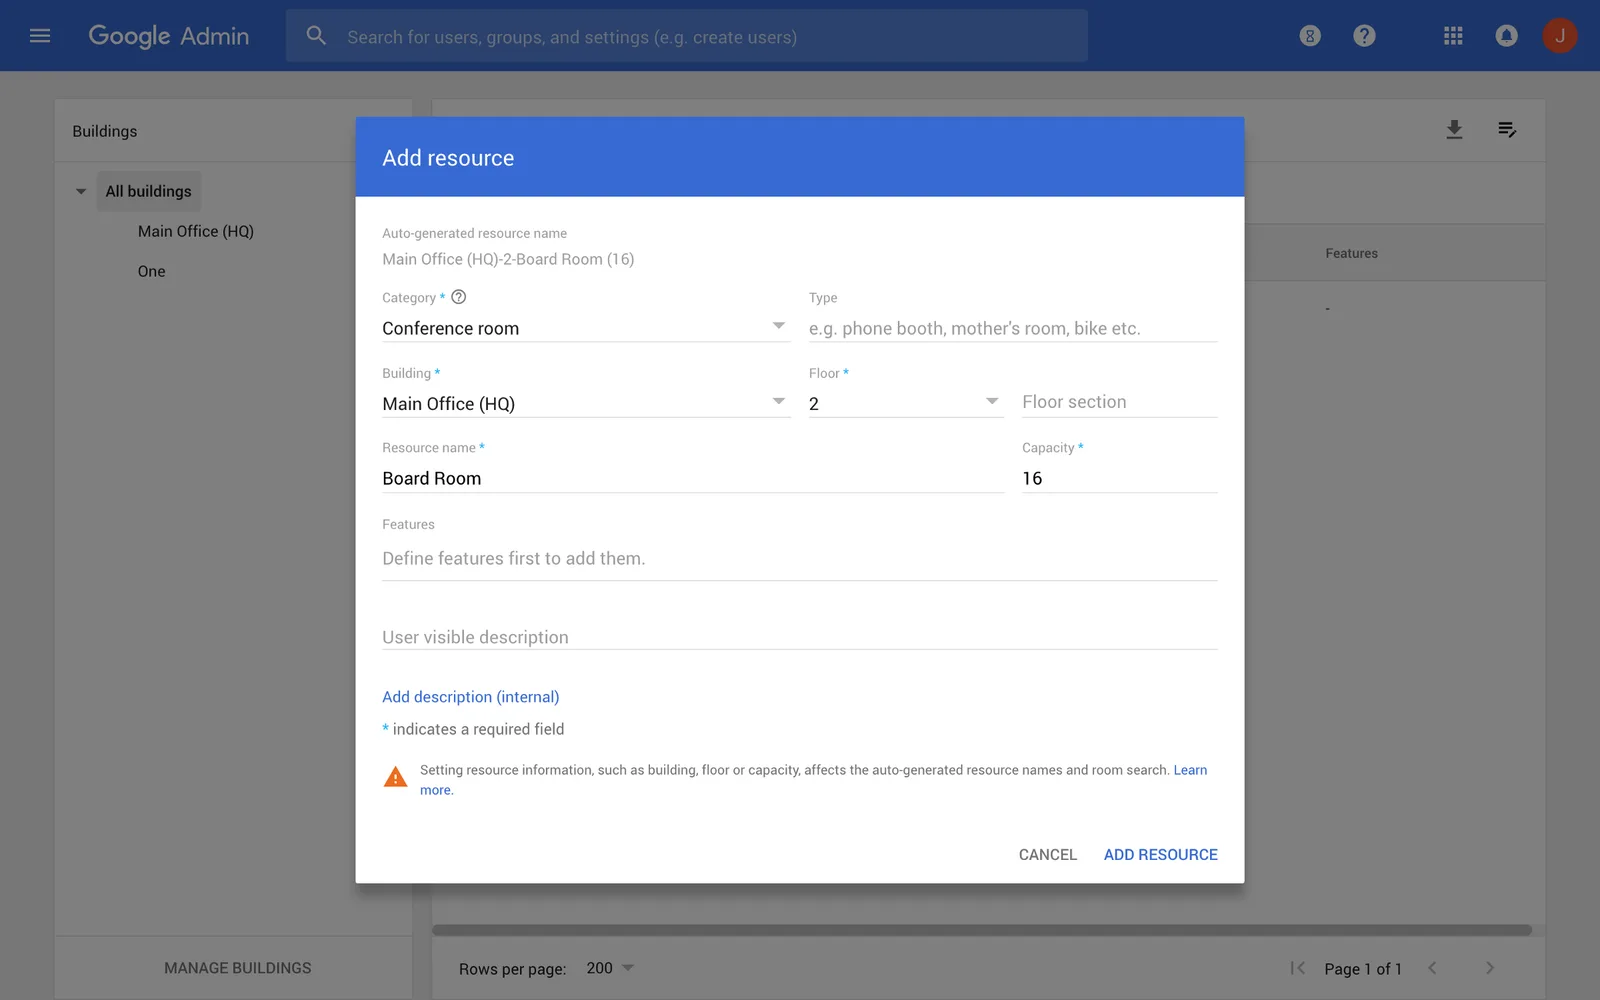
Add Resource Dialog:
Re-open your Newly-created Resource
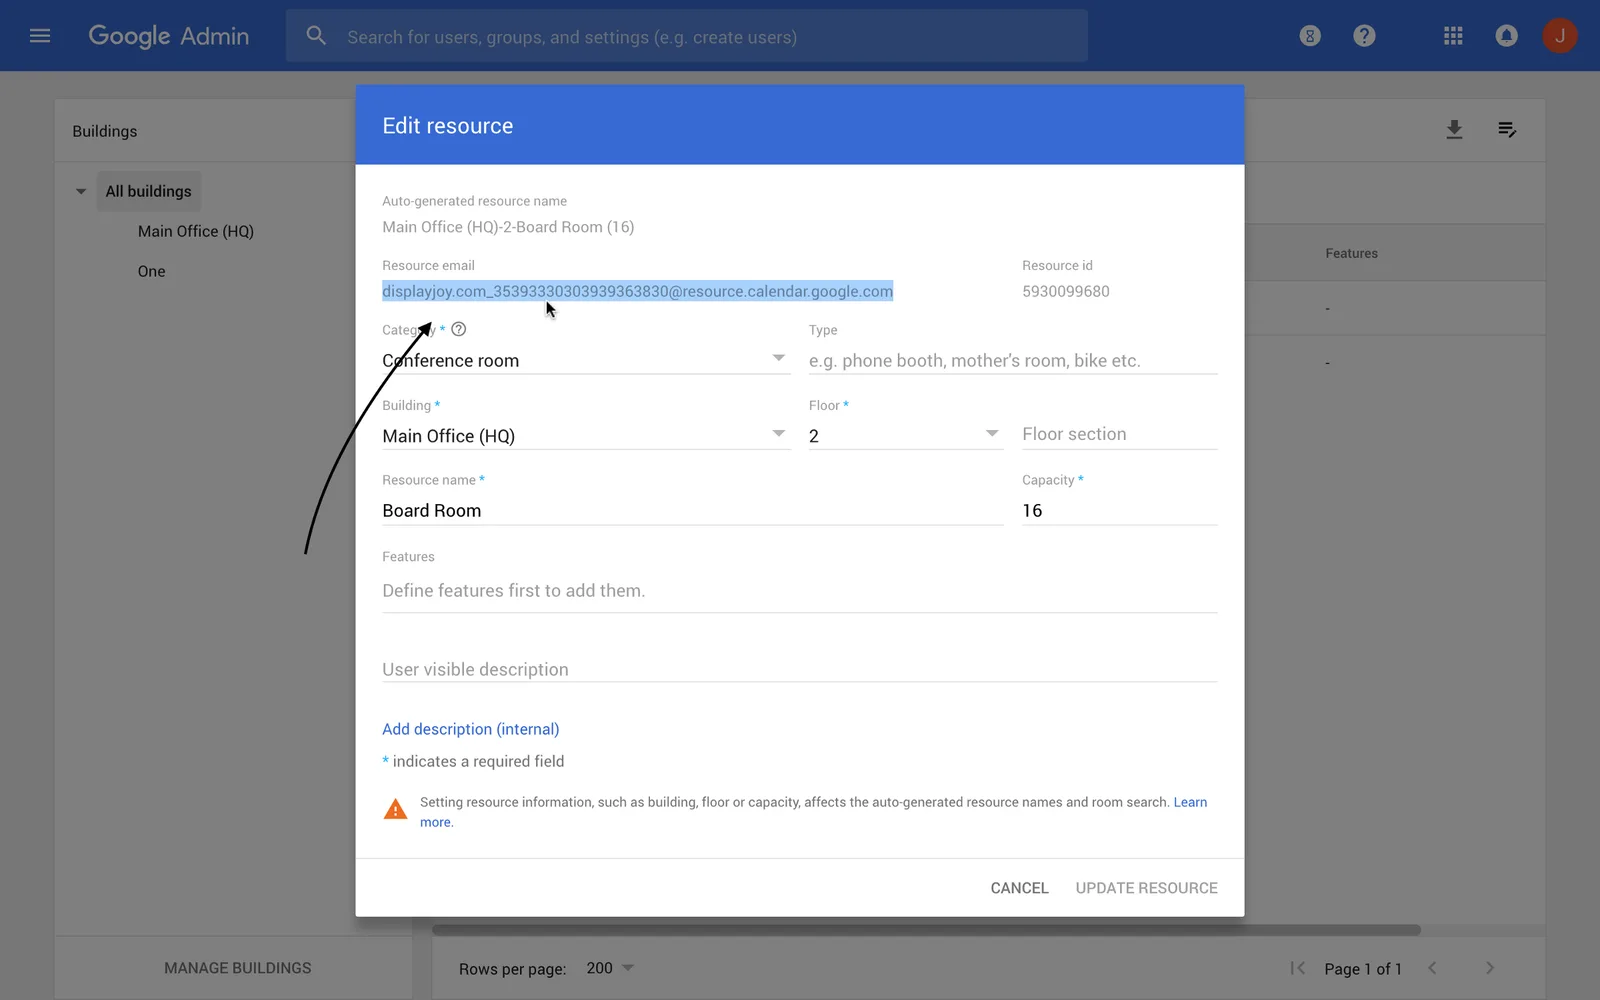
Congratulations! You’ve probably just successfully added your resource. But where exactly is your Resource Mailbox Email Address?
To find this, you’ll need to re-open your Newly-created Resource Mailbox
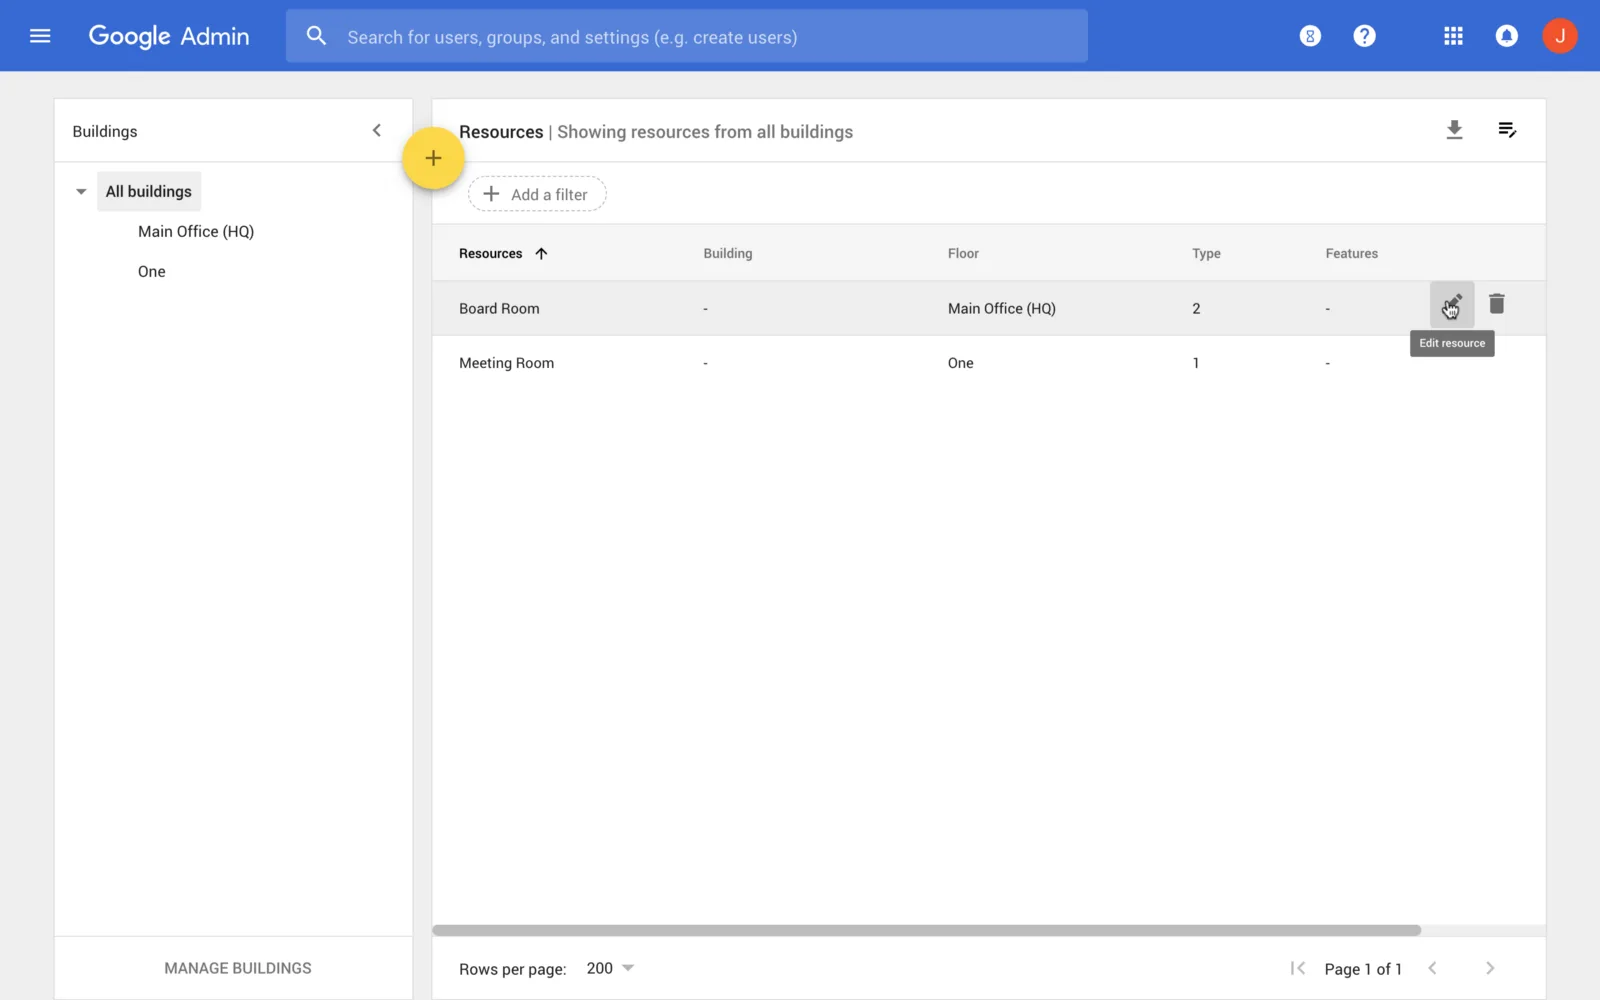
If you’ve left the page, head over to https://admin.google.com/u/0/ac/calendarresources/resources
(Apps > Google Workspace > Calendar > Resources)
From there, you’ll be able to select and copy your resource mailbox email address. You’ll need this to configure your Meeting Room display.
That’s it! You’ve just set up your first Resource in G Suite.
If you’re stuck, chat with us on Meeting Room 365, and we can help you out with display setup, configuration, and provisioning.
References
Manage Calendar resources — Google Workspace Administrator Help
Thanks for reading!
Please Recommend and Share if you found this article useful!