How we unlocked the hidden web browser in the Nintendo Switch to turn it into a Meeting Room Display
Permanently Unlock the Switch’s Hidden Web Browser in under a minute! No mods required. [DIY] [Nintendo Switch] [DNS]

Permanently Unlock the Switch’s Hidden Web Browser in under a minute! No mods required. [DIY] [Nintendo Switch] [DNS]

About us
We’re Meeting Room 365, a startup in Seattle, WA, building Meeting Room display software for IT departments around the world. You can find out more at https://meetingroom365.com/ Full disclaimer: We’re not affiliated with Nintendo in any way.
Why the Nintendo Switch?
While the Nintendo Switch may not be an ideal platform for most, it presented an interesting challenge, and we’re a uniquely-curious bunch of IT Developers. Plus, it gave us an opportunity to learn more about the Switch hardware, and built-in web browser. AND, the opportunity to write this cool tutorial. And this same technique can be applied to view any website using the Switch’s built-in browser (neat, right?)
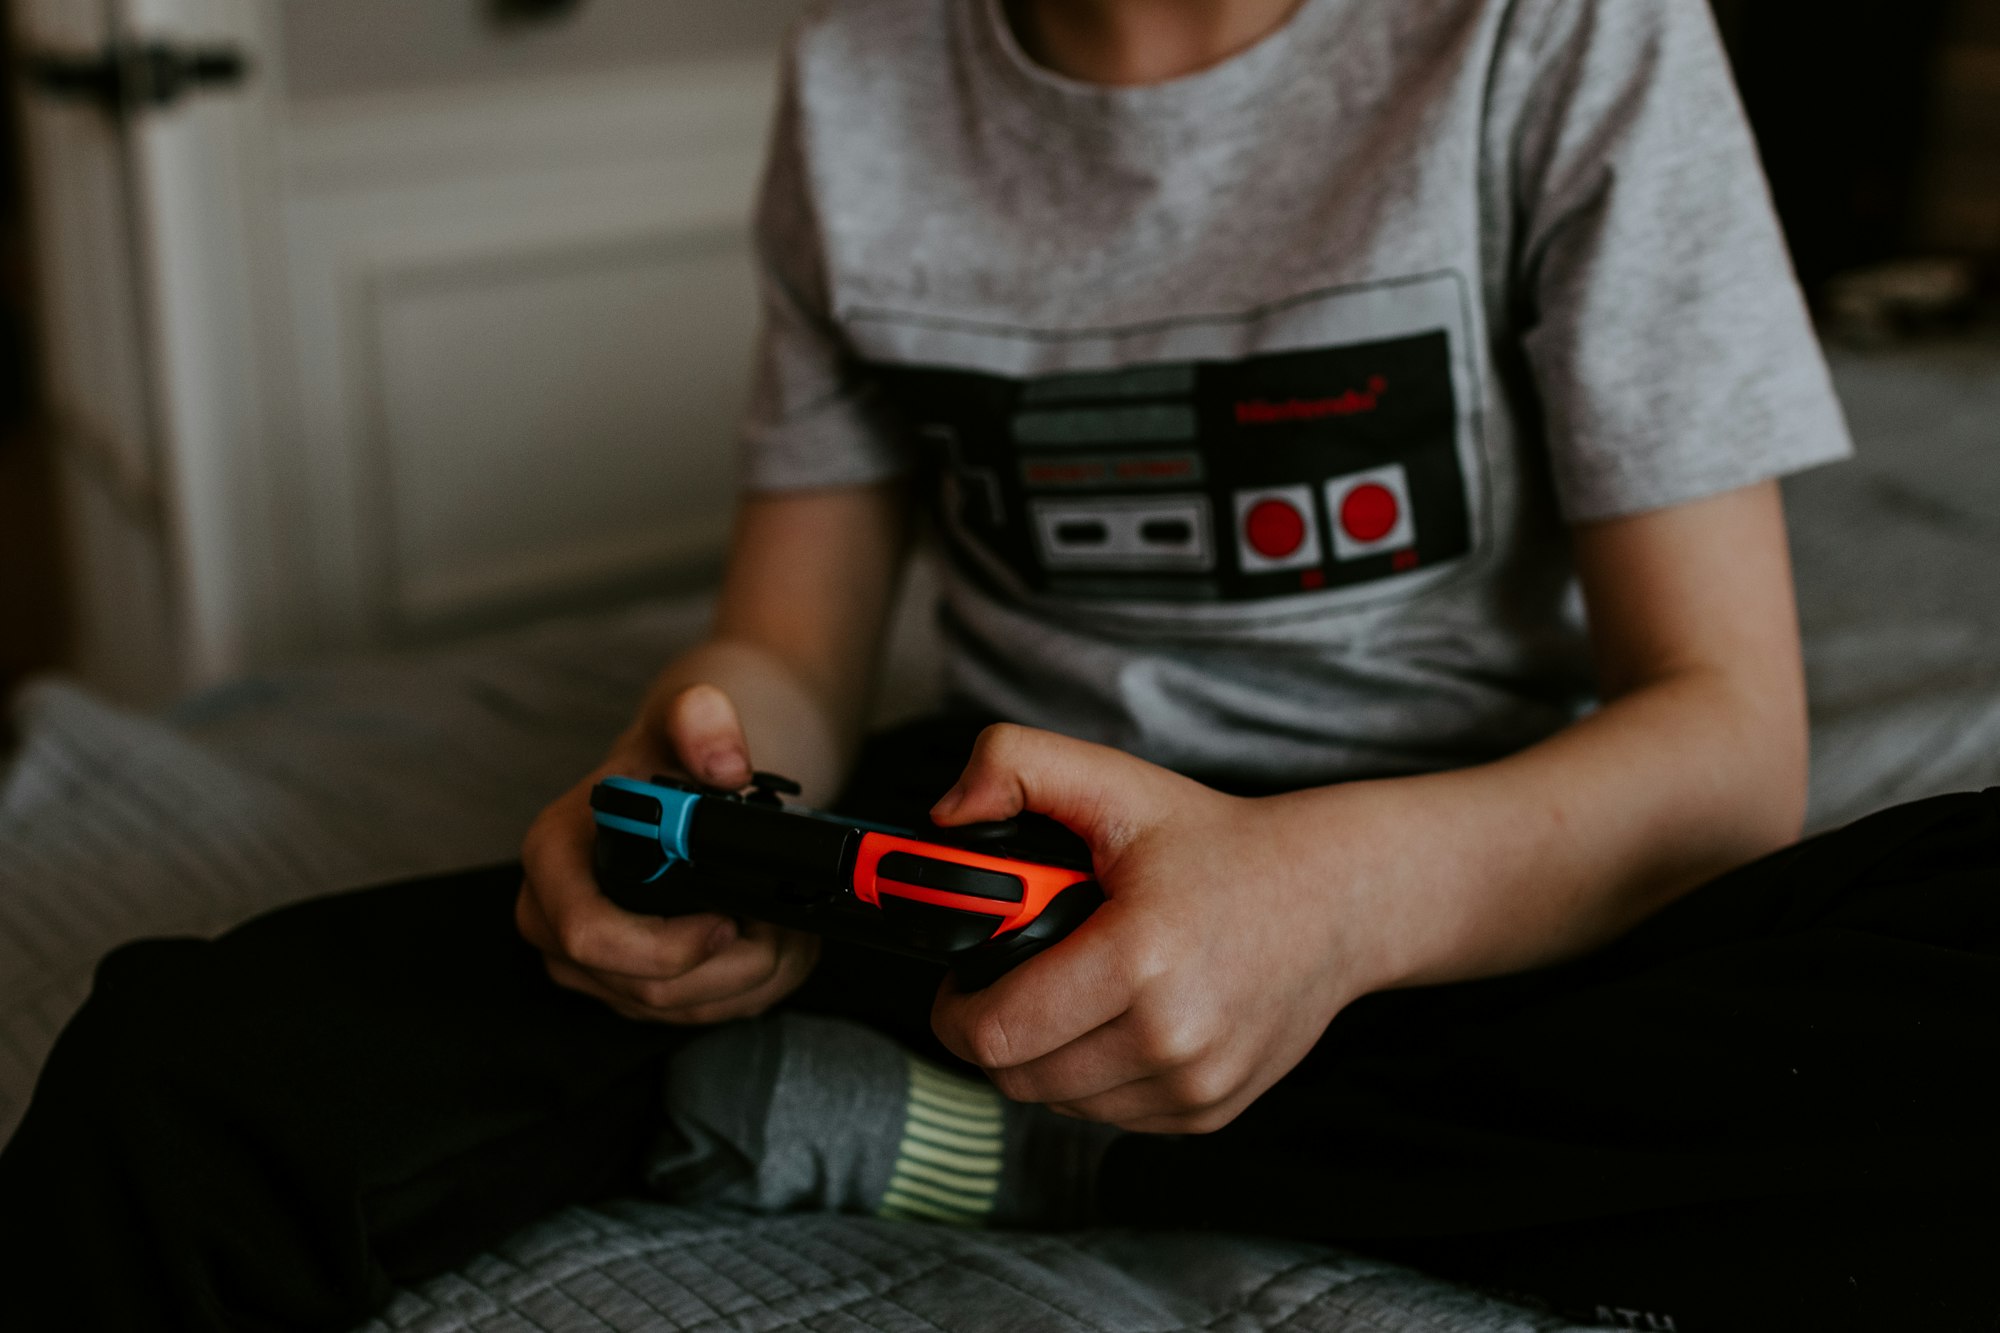
What you’ll need:
- A Nintendo Switch
- A free Meeting Room 365 Account (optional)
- Office 365, Exchange, or G Suite Meeting Room Resource Mailbox credentials (optional)
Inspiration
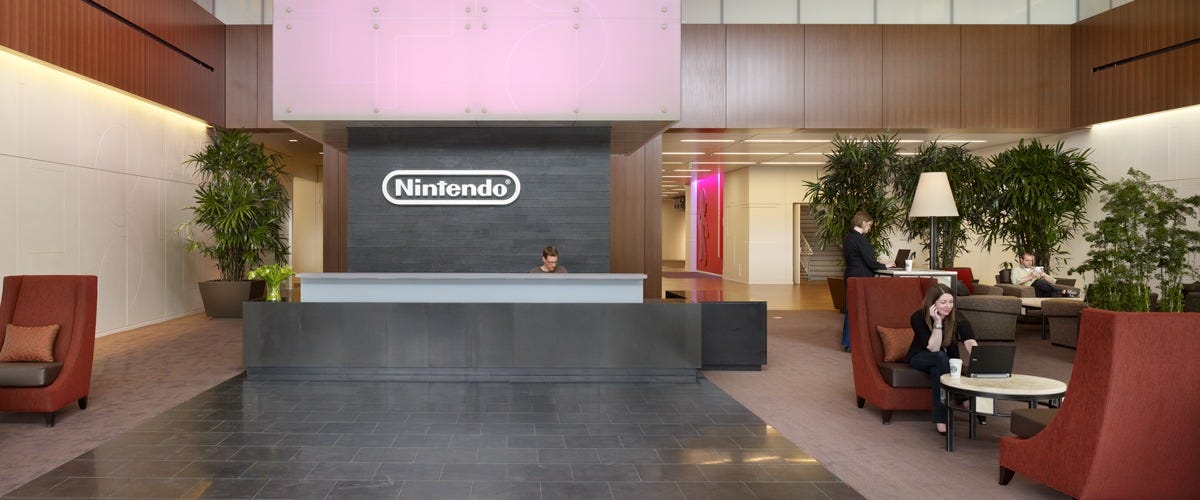
The idea for this post was Inspired by the Nintendo of America HQ in Redmond, WA, near our offices in Seattle. We like to build case-studies and personas, which explore how meeting rooms and office space is used around the world, to continue to improve our products.
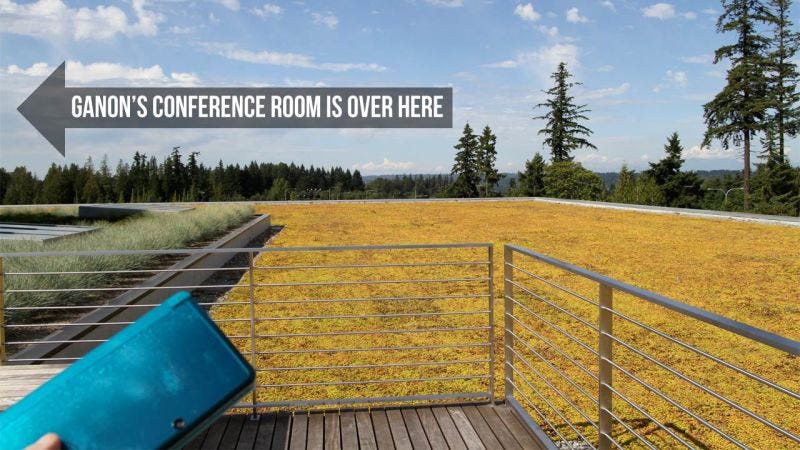
Conference rooms in the building are all named for Nintendo stuff. There’s the Another Castle room, for example. The top floor is all Zelda conference rooms, including a Ganon room with magnificent views and what sounds like the most important meeting space in the building, the Master Sword. On the third floor, is the Mario quadrant. It has a listing of Mario-themed conference rooms: Hookbill the Koopa, Shy Guy, Boo, Bullet Bill, Isle Delfino and Koopalings.
Read more about the Nintendo of America HQ in Redmond:The Coolest Things in Nintendo's American Headquarters (And One Uncool Thing)
Let's get the one uncool thing about Nintendo of America's headquarters out of the way first: They won't let visitors…
Nintendo of America Offices in Redmond, WA
Create a free Meeting Room 365 Account
Sign up for a Free Meeting Room 365 account. This will allow you to create and deploy unlimited, customizable meeting room displays. Pay when you’re ready (each display is free for 30 days, then it’s $5/month per display. Annual discounts available).
More details: https://medium.com/meeting-room-365/how-to-add-a-meeting-room-display-to-office-365-6d42561e2f5b
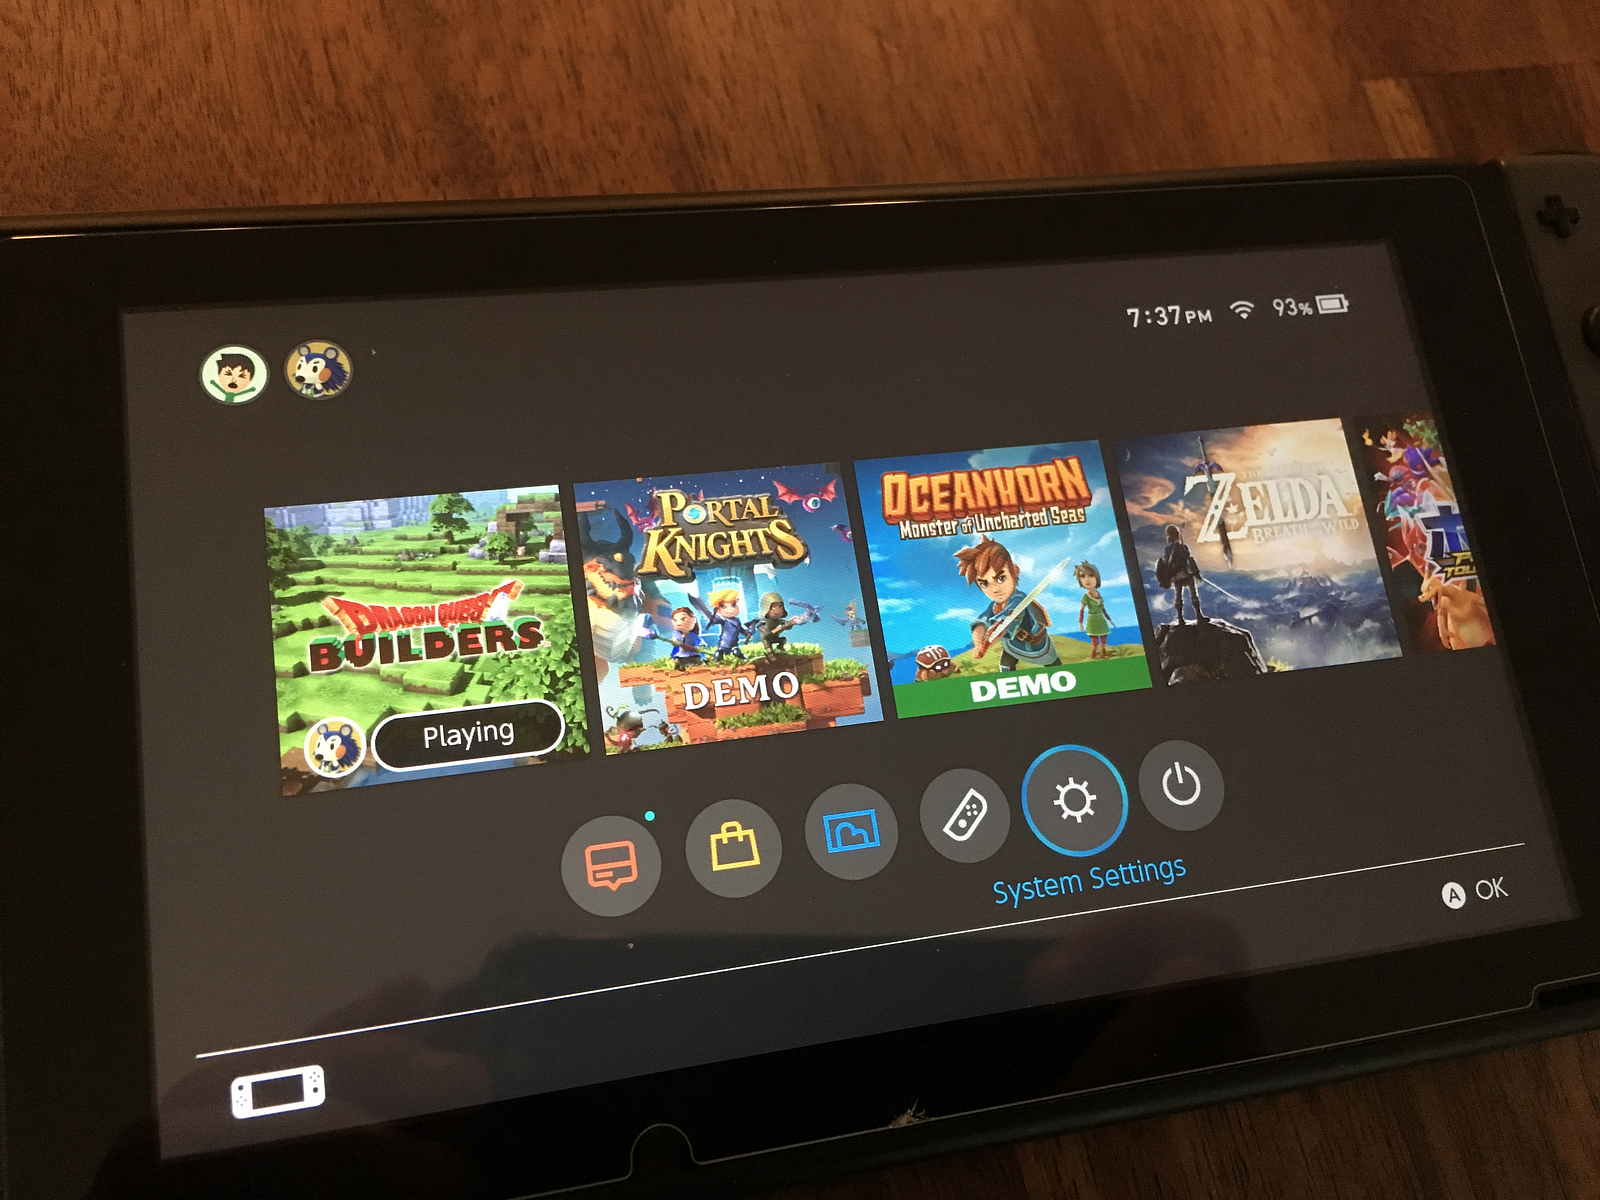
Accessing the Hidden Internet Browser on your Nintendo Switch
You probably already figured this out if you’ve ever visited the Nintendo e-shop on your switch: There is a full internet browser built-in to the Switch.
This may sound great, but Nintendo isn’t about to let you access it willy nilly.
To get full access to the browser, we’re going to have to employ a really simple hack. We’ll set up a DNS proxy, to trick the Switch into thinking we’ve connected to a Public Wifi Access point. The Switch will then launch a full web browser to deal with our (supposed) captive portal, giving us free reign to access whatever we like.
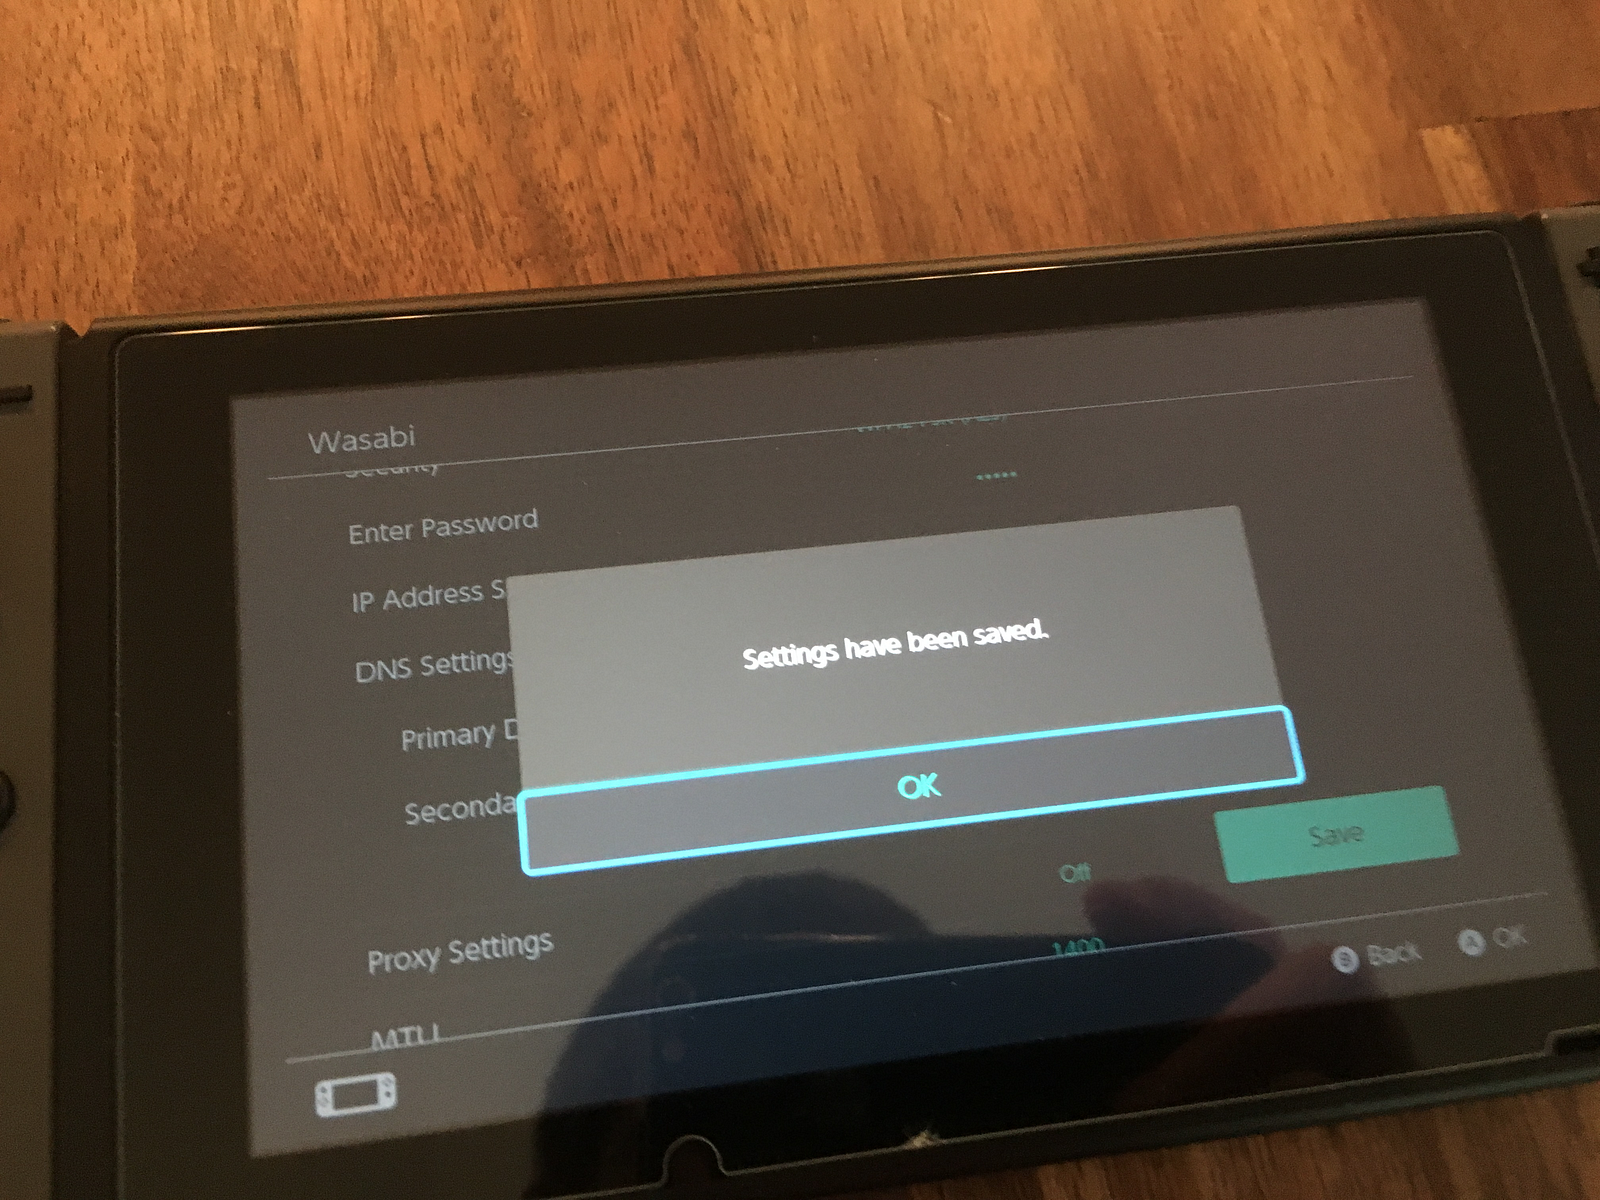
Enter System Settings
Select Internet, -> Internet Settings
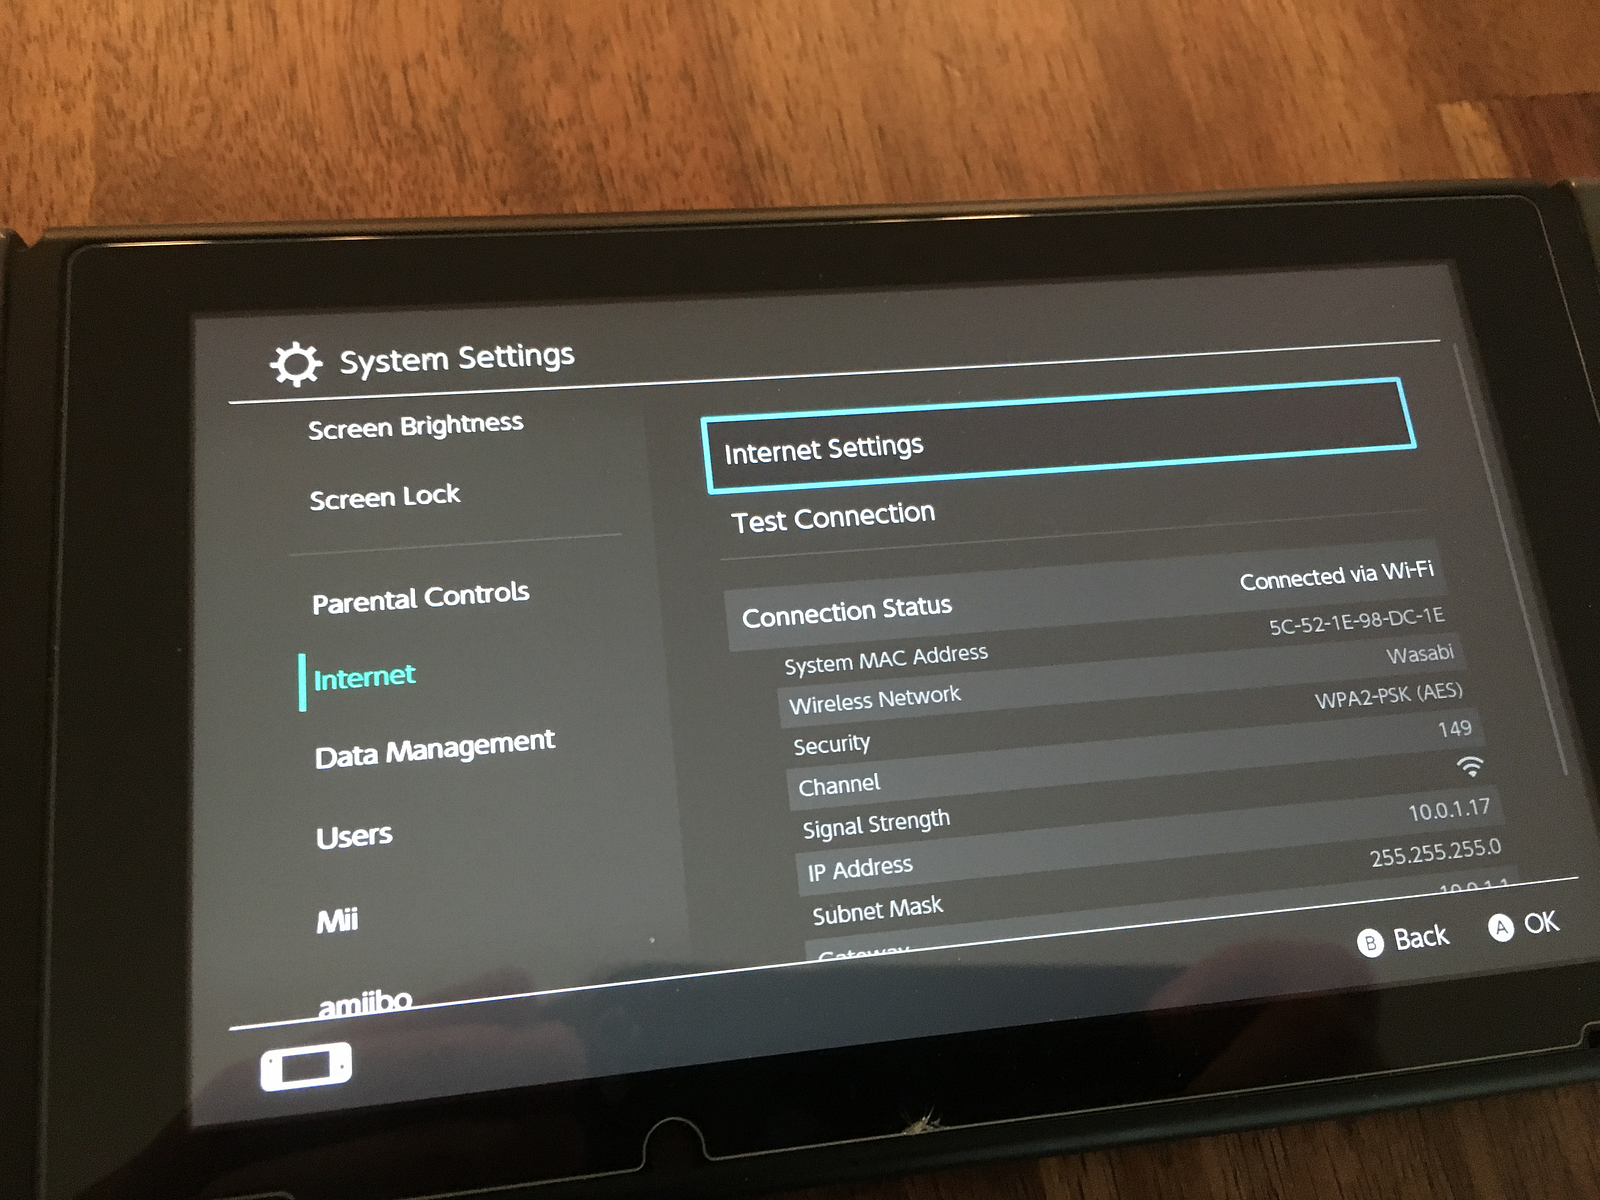
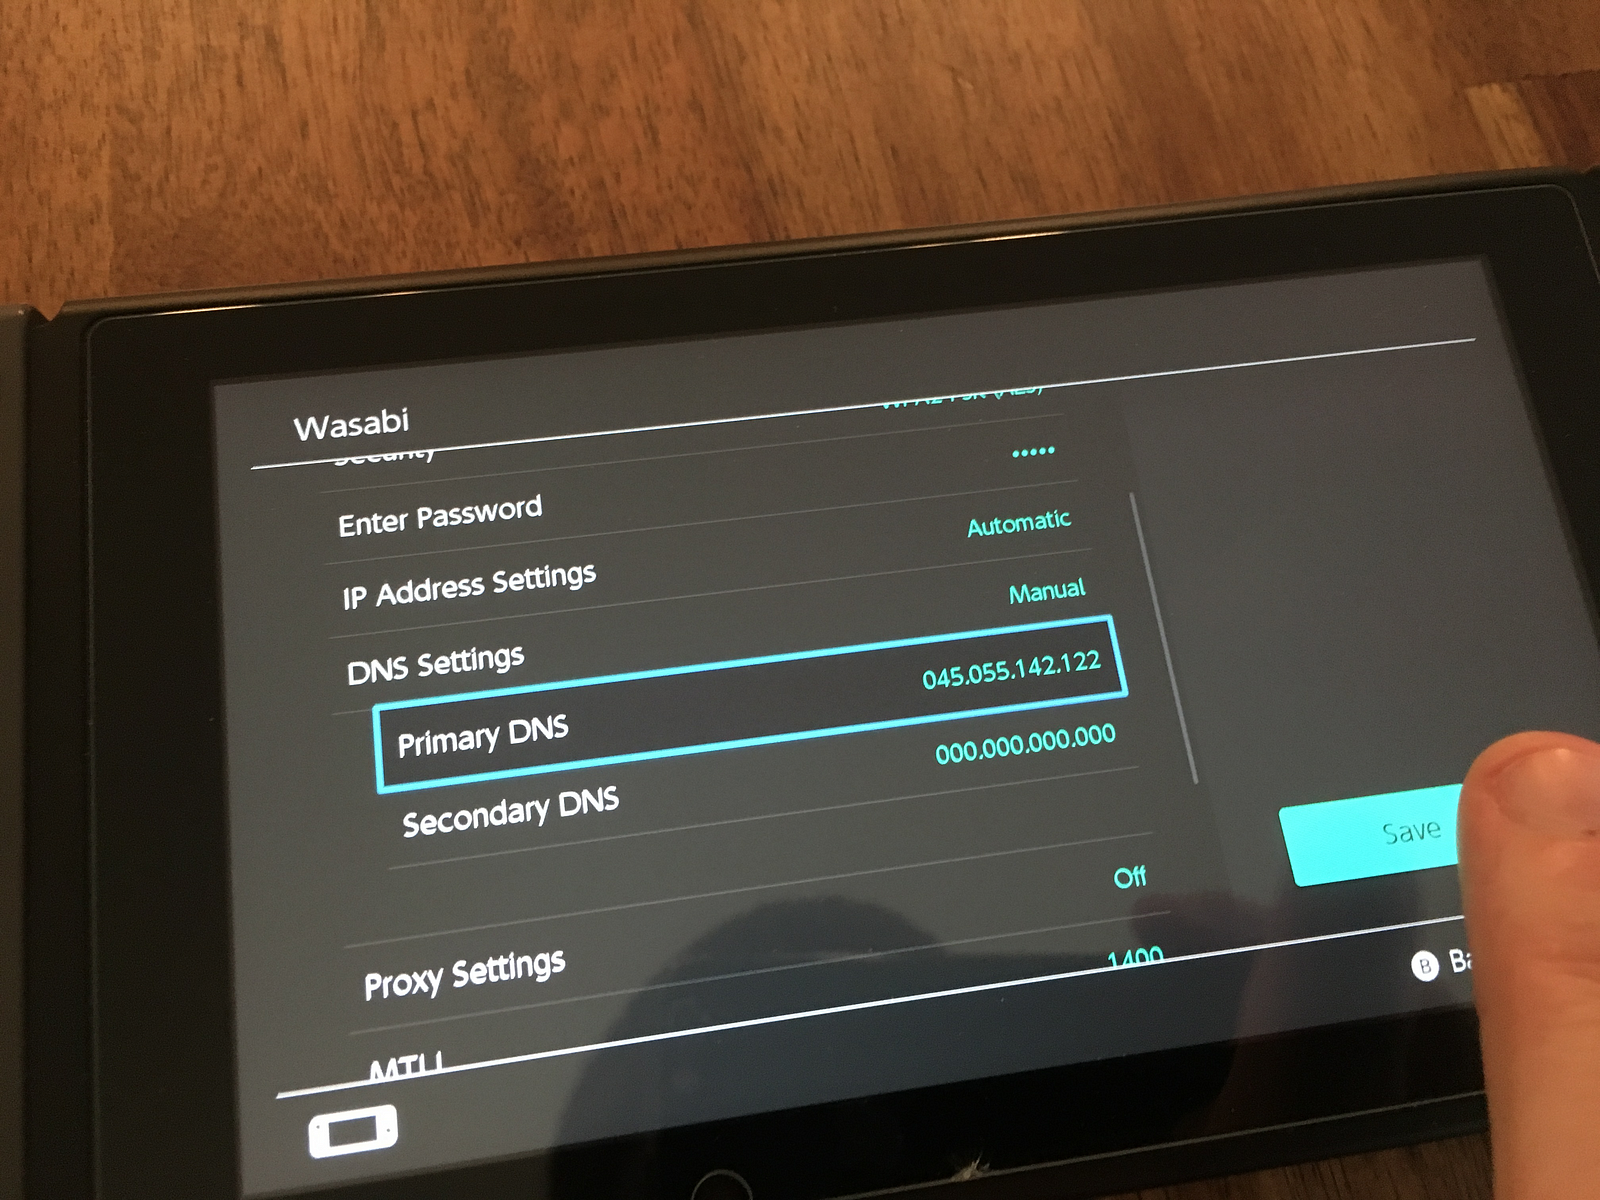
Switch your DNS Settings from Automatic to Manual
Then, update your Primary DNS to our interstitial page:54.38.208.116
If that doesn’t work, you can use this as a backup: 45.55.142.122
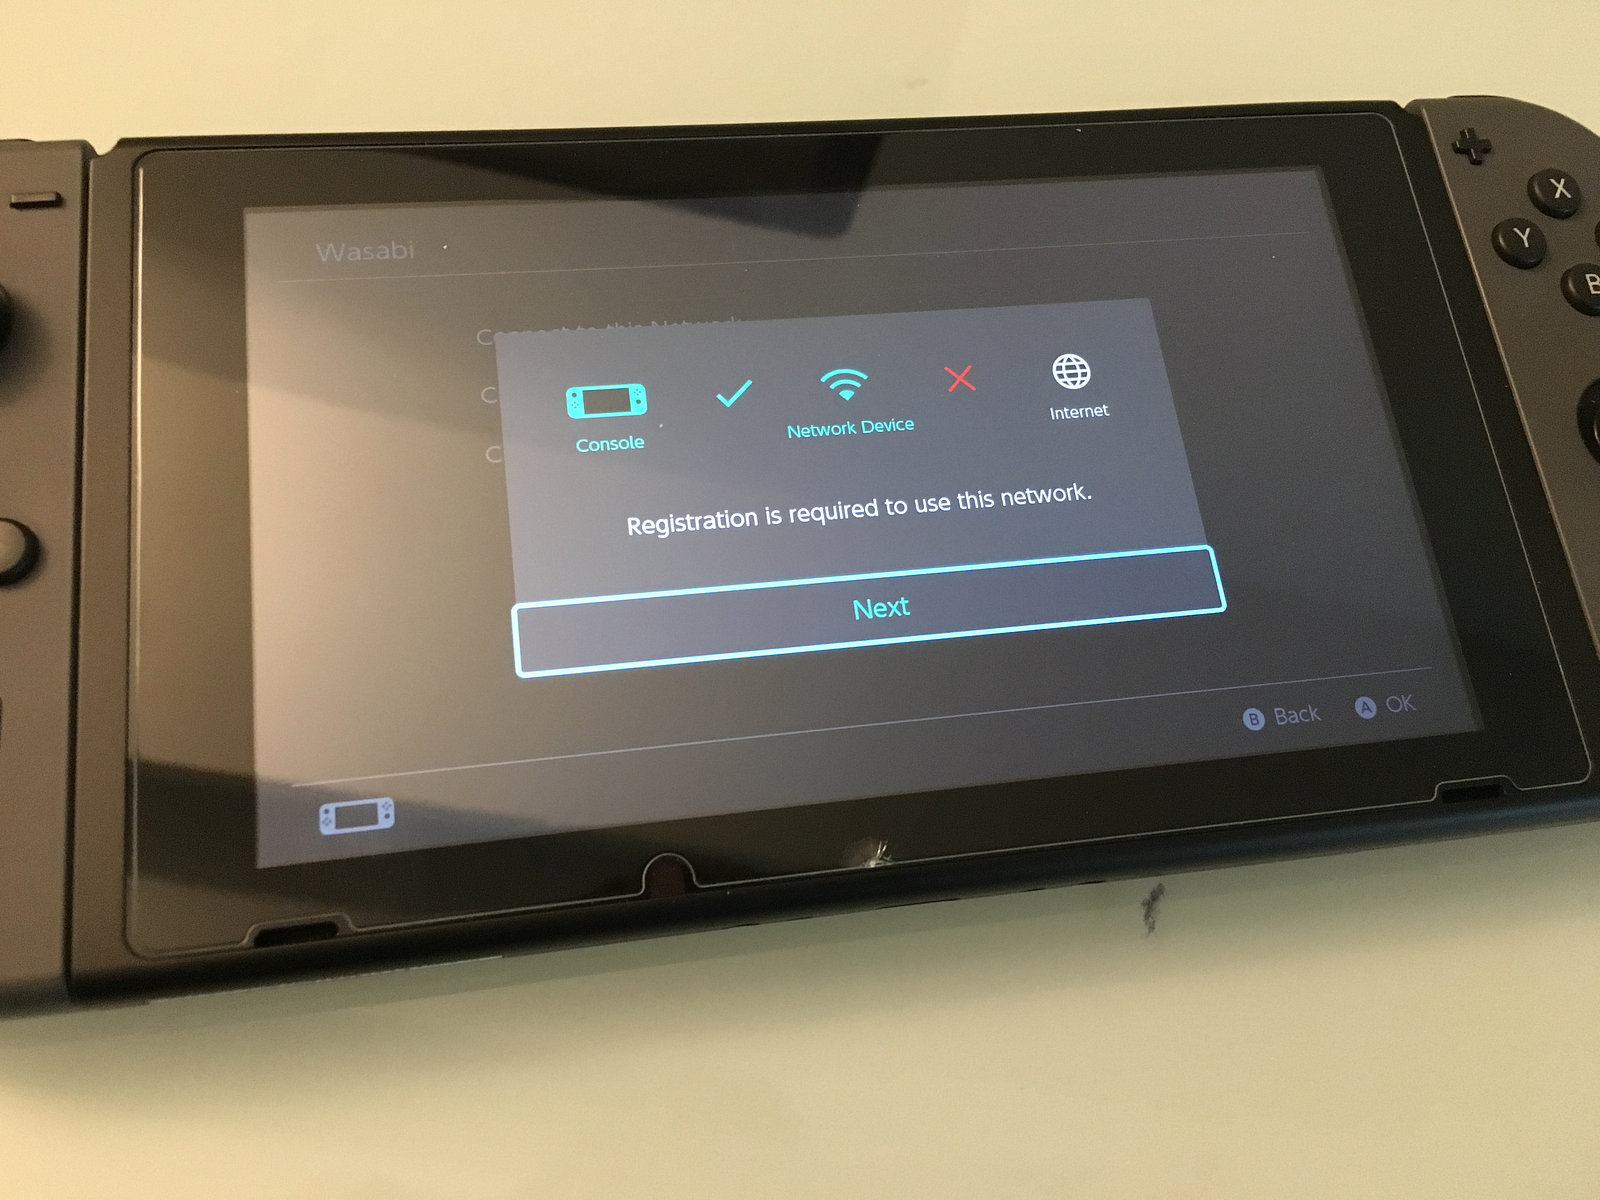
Connect to your Wireless Network
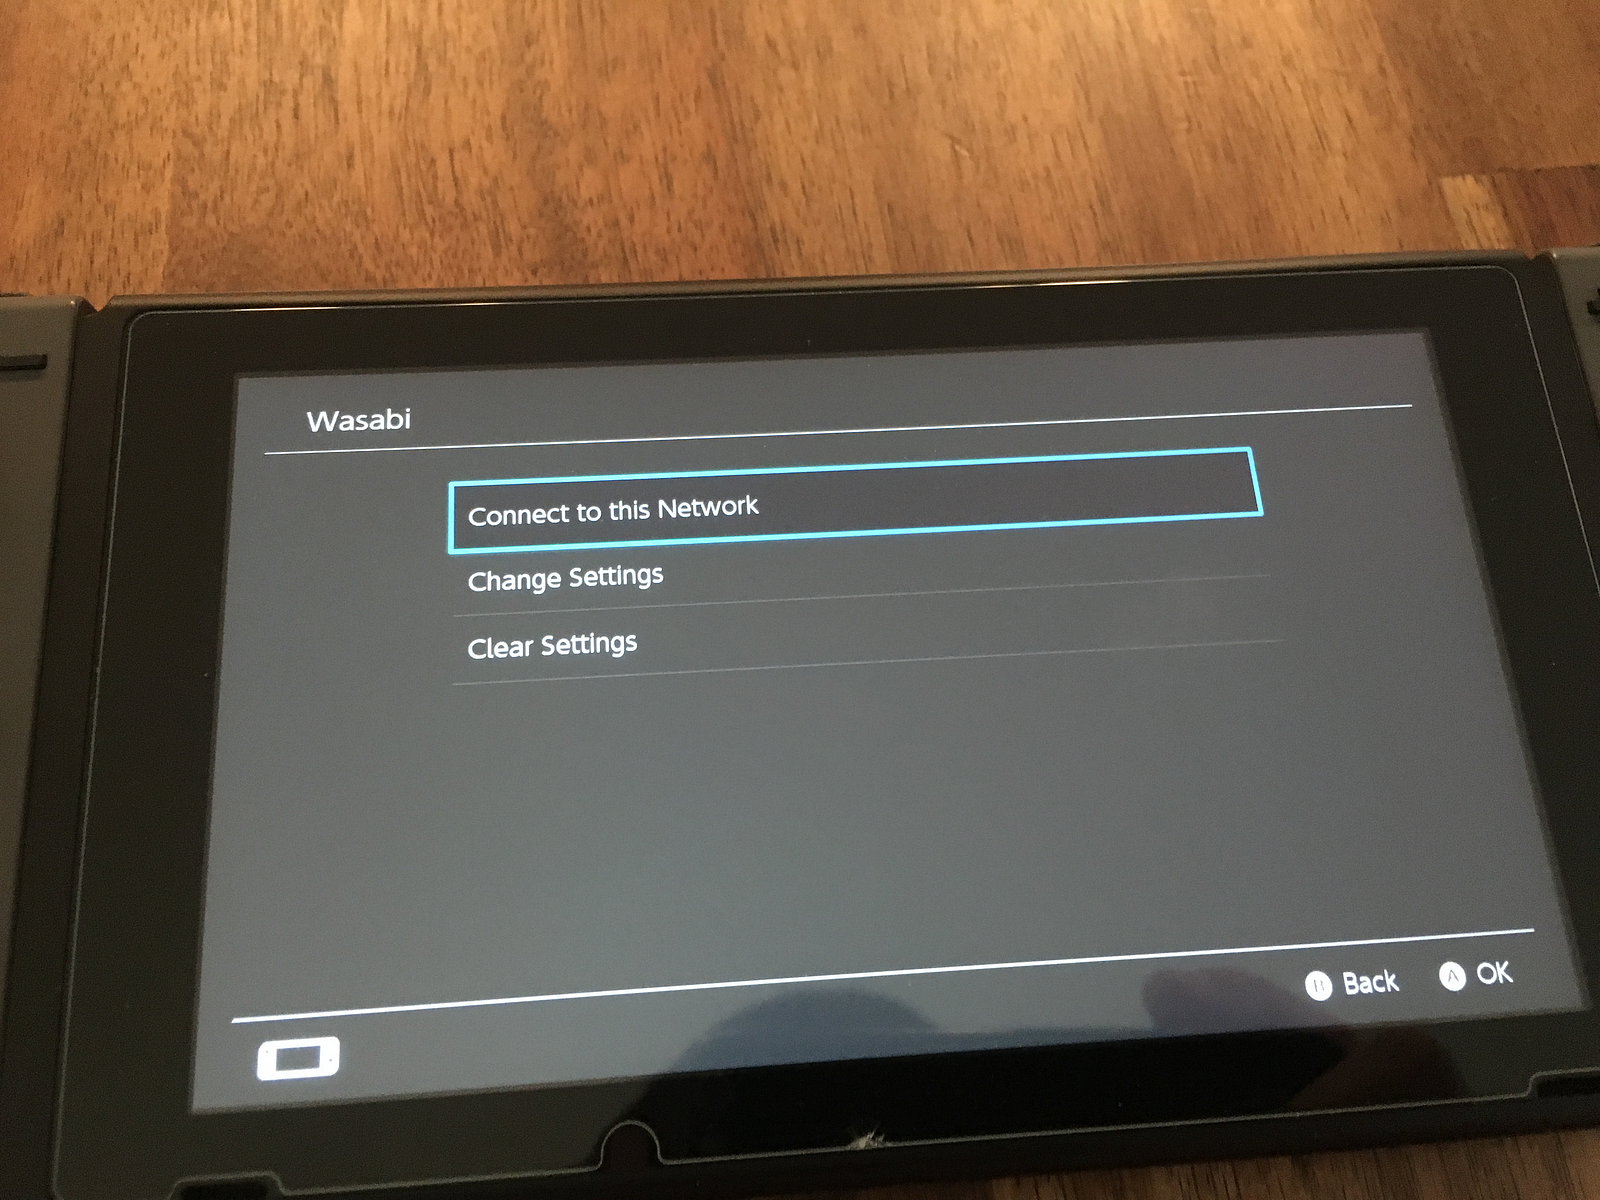
Wait for it to FAIL!
Yes, the next step should FAIL! This is because, thanks to this DNS proxy, your Switch will think you are using a public Wifi hotspot, and need to log in. Handing over full browser control in a pop-up window.
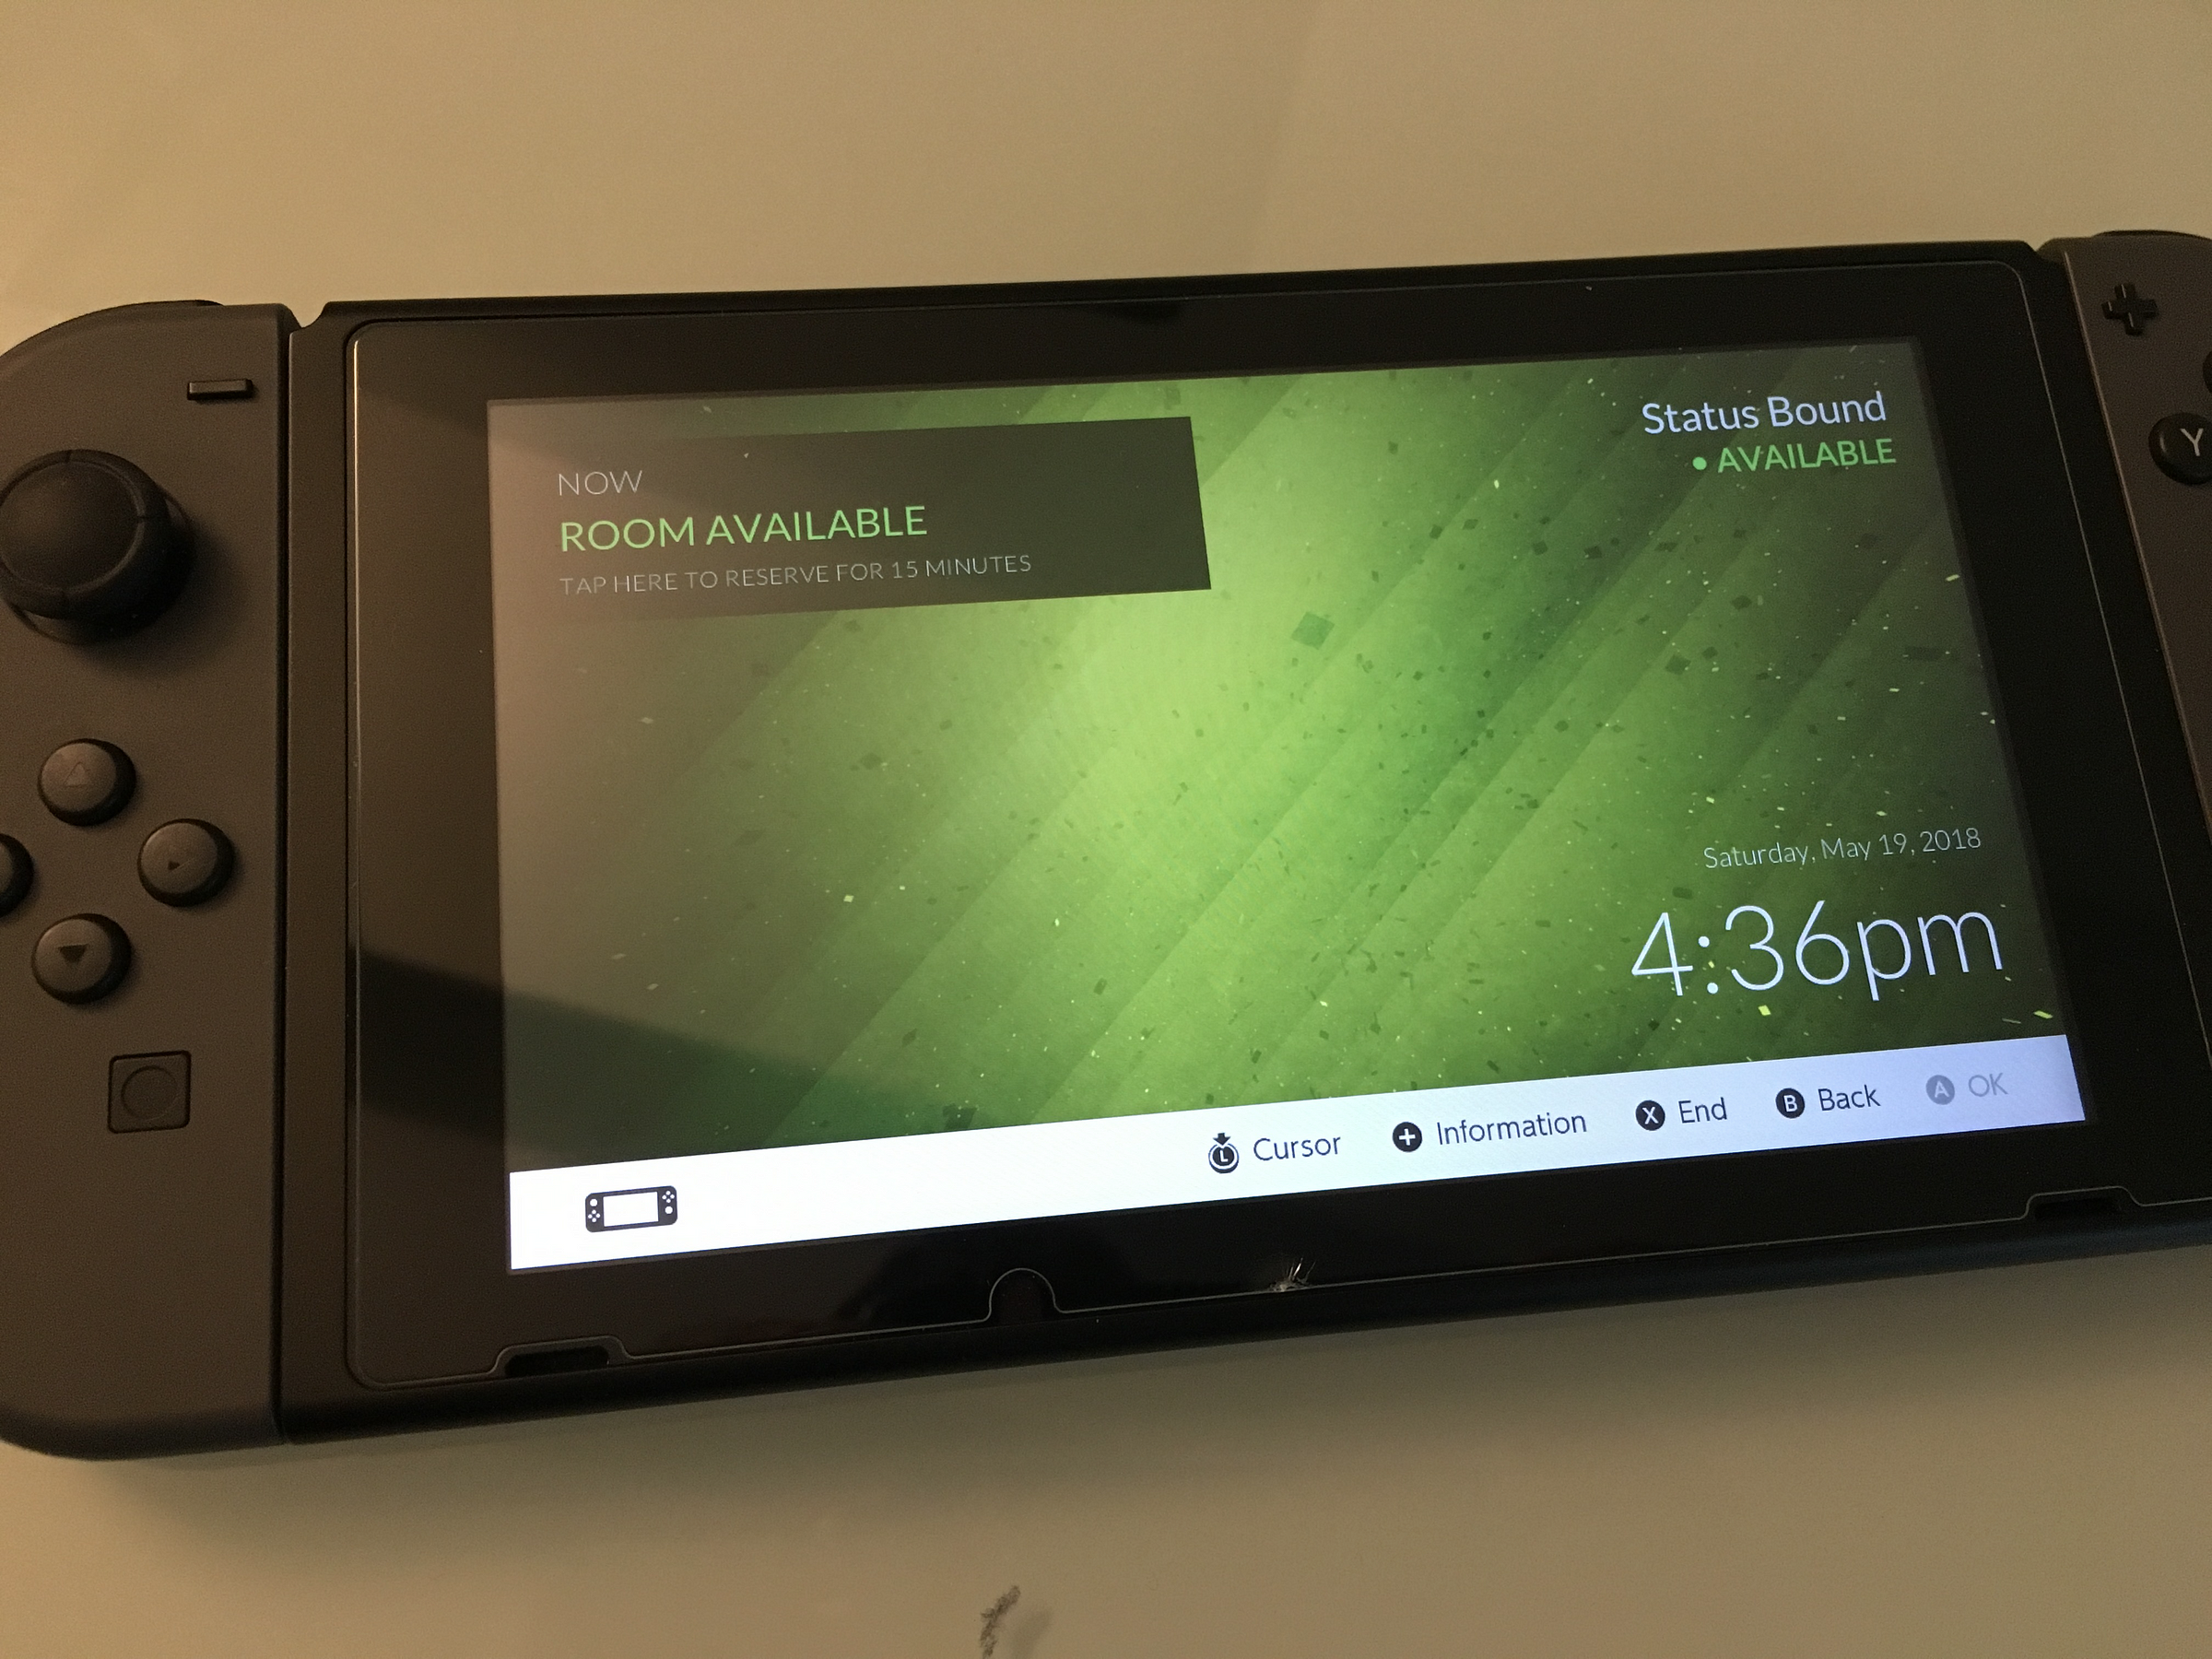
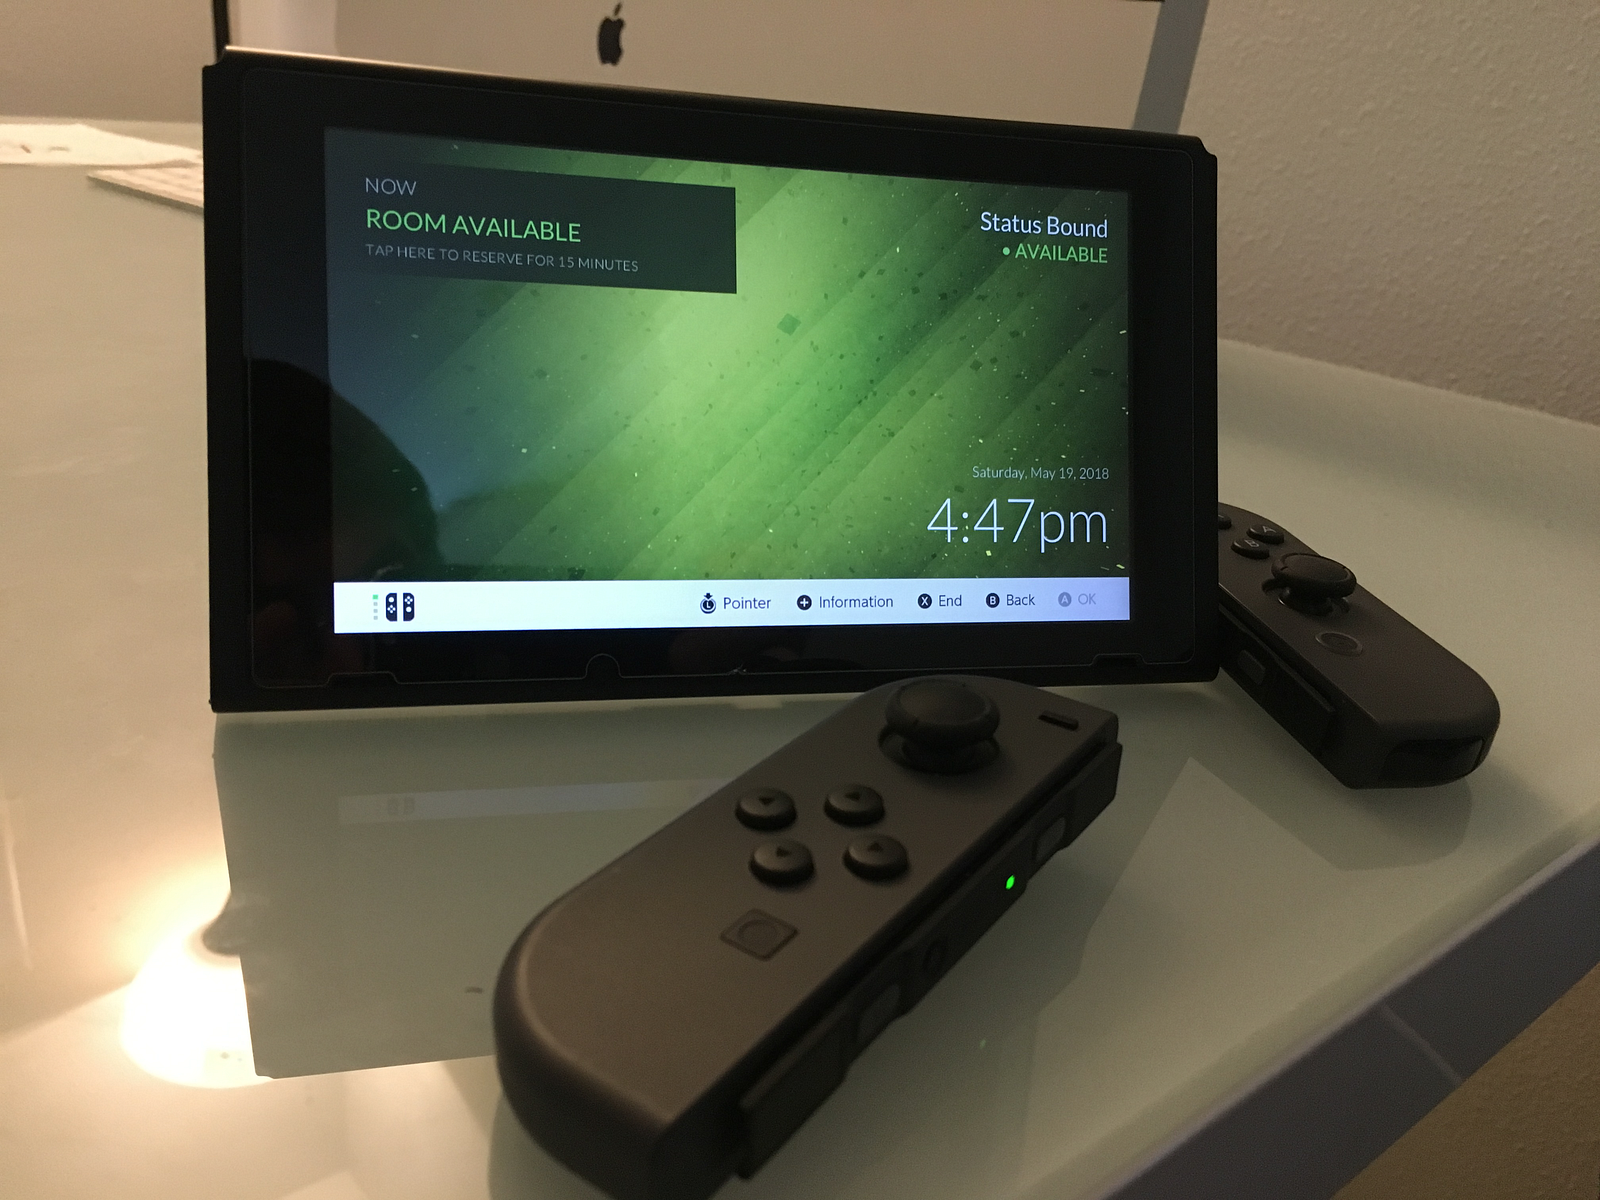
Setting Up the Nintendo Switch as a Display
Setting up the Nintendo Switch is quite an enjoyable experience, and only takes a couple of minutes.
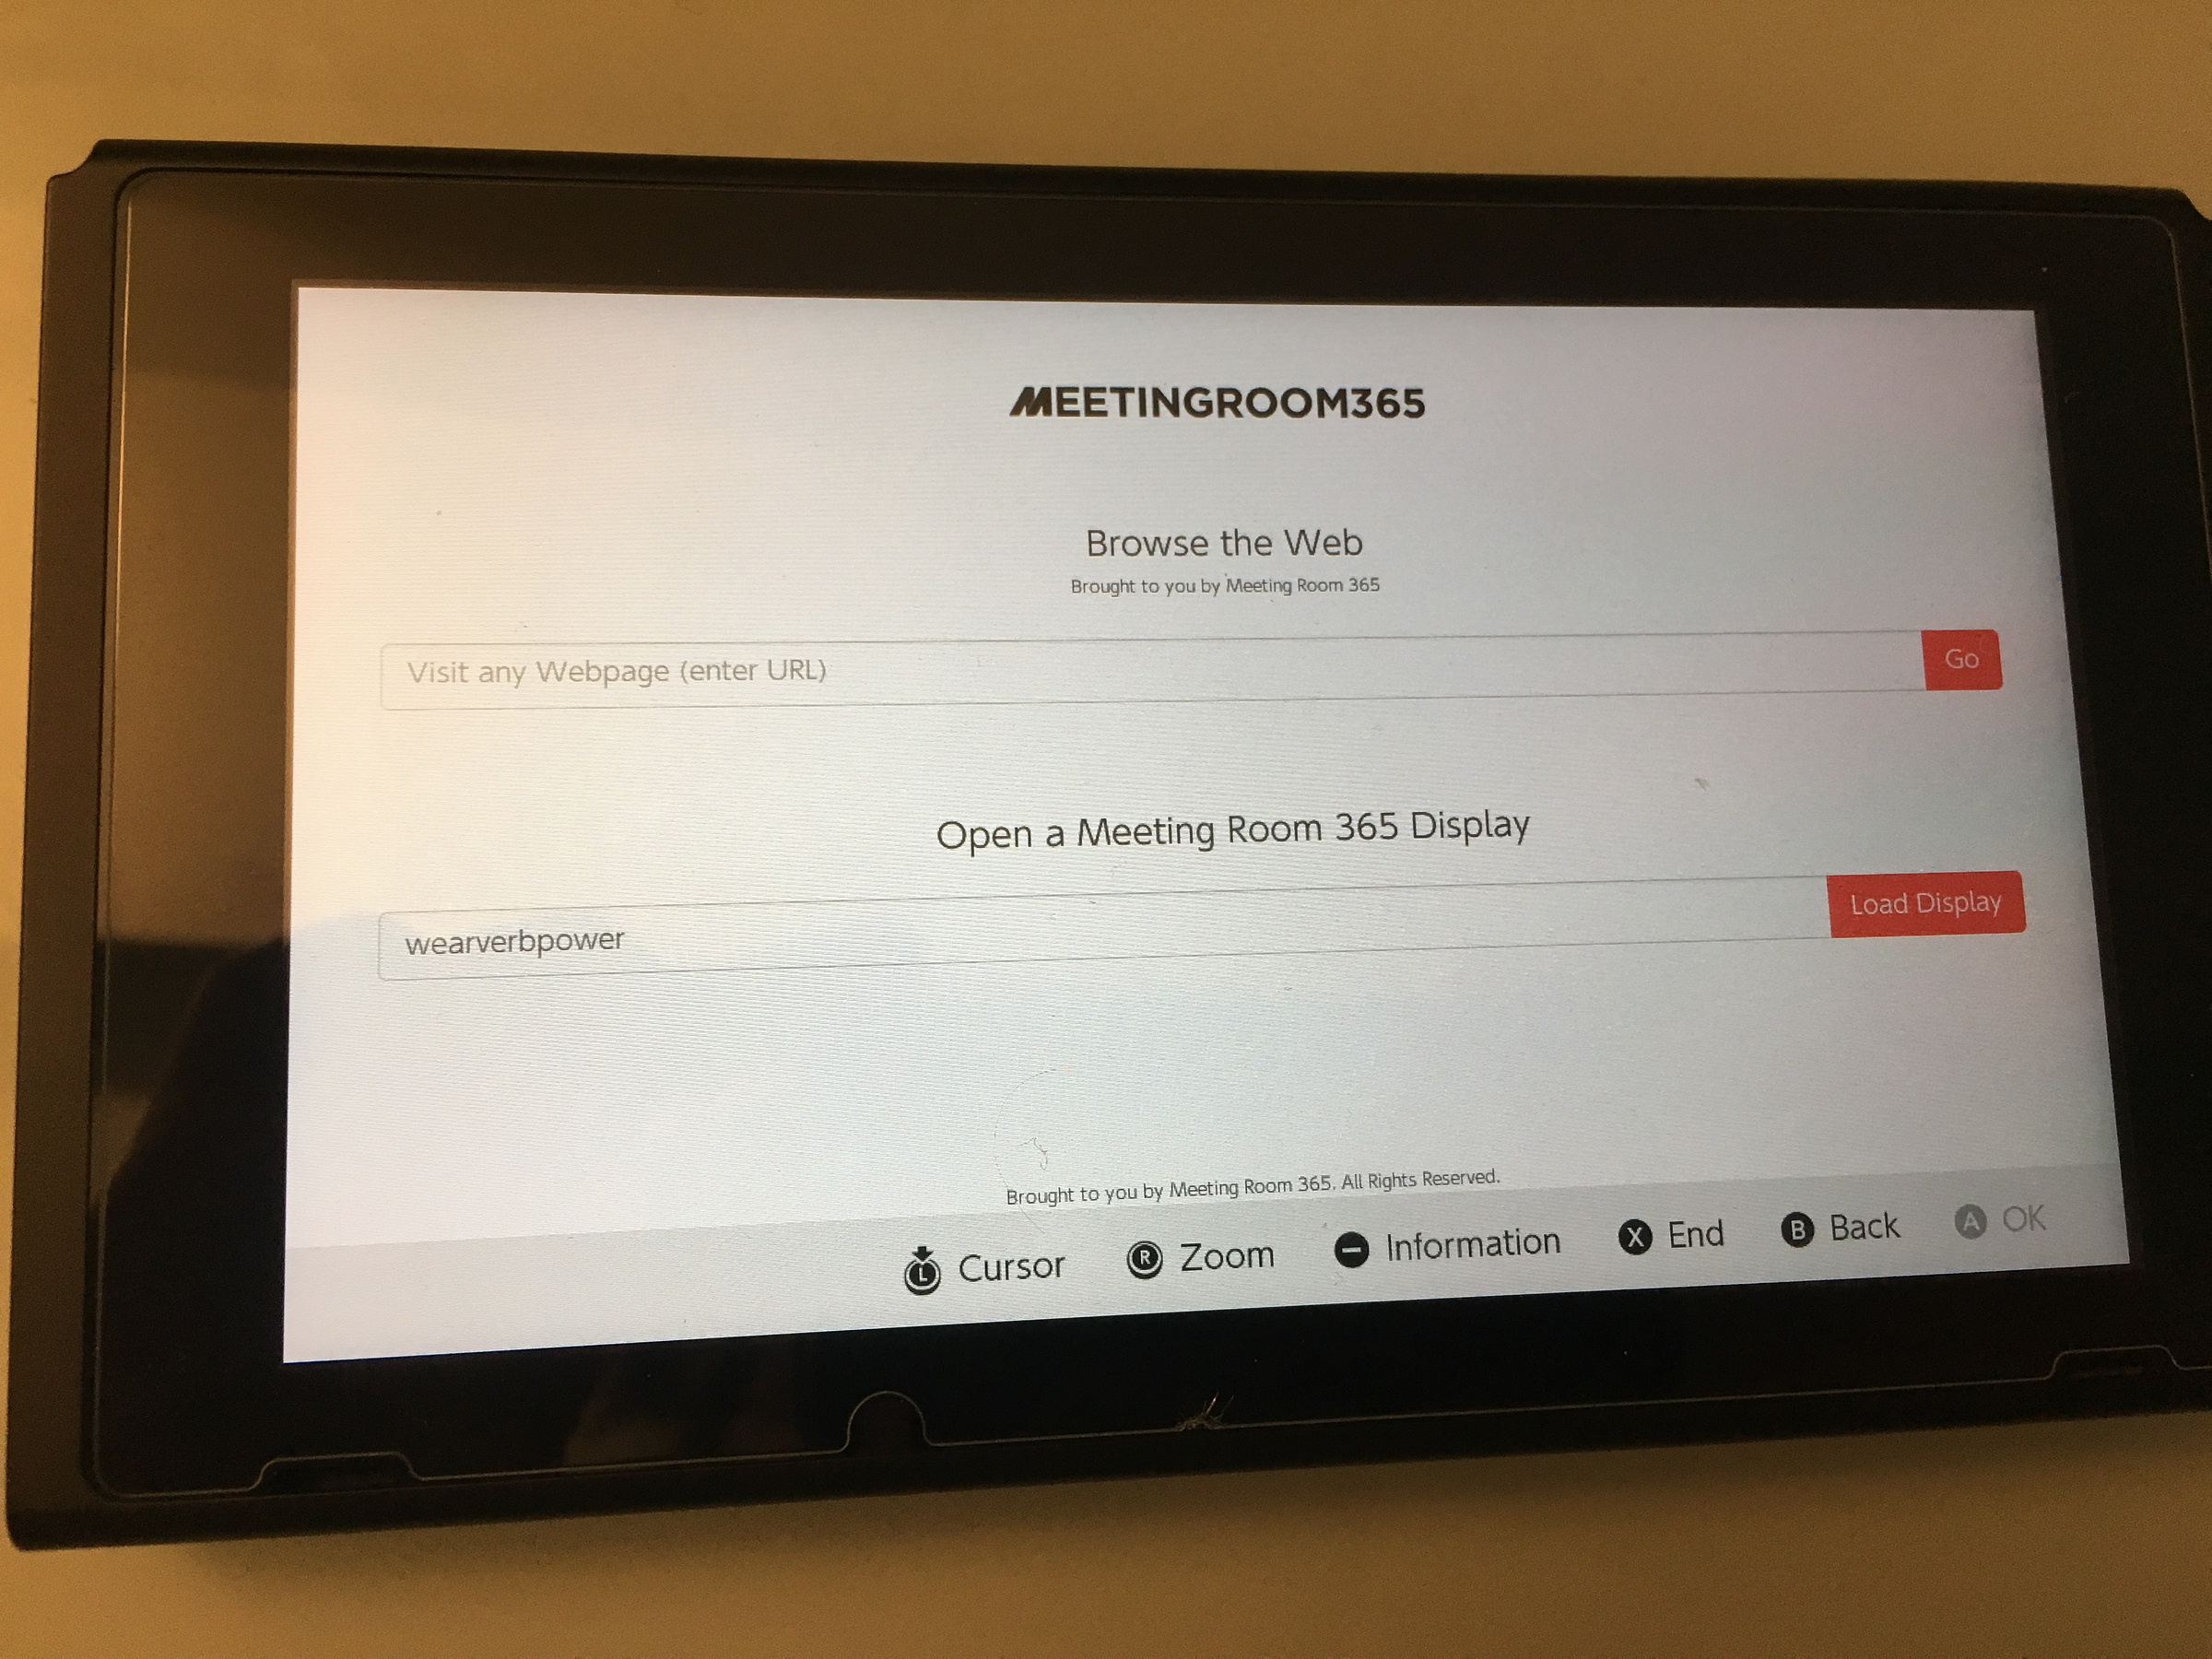
Enter your Display URL
Once the page loads, enter your Display Key. An example: wearverbpower

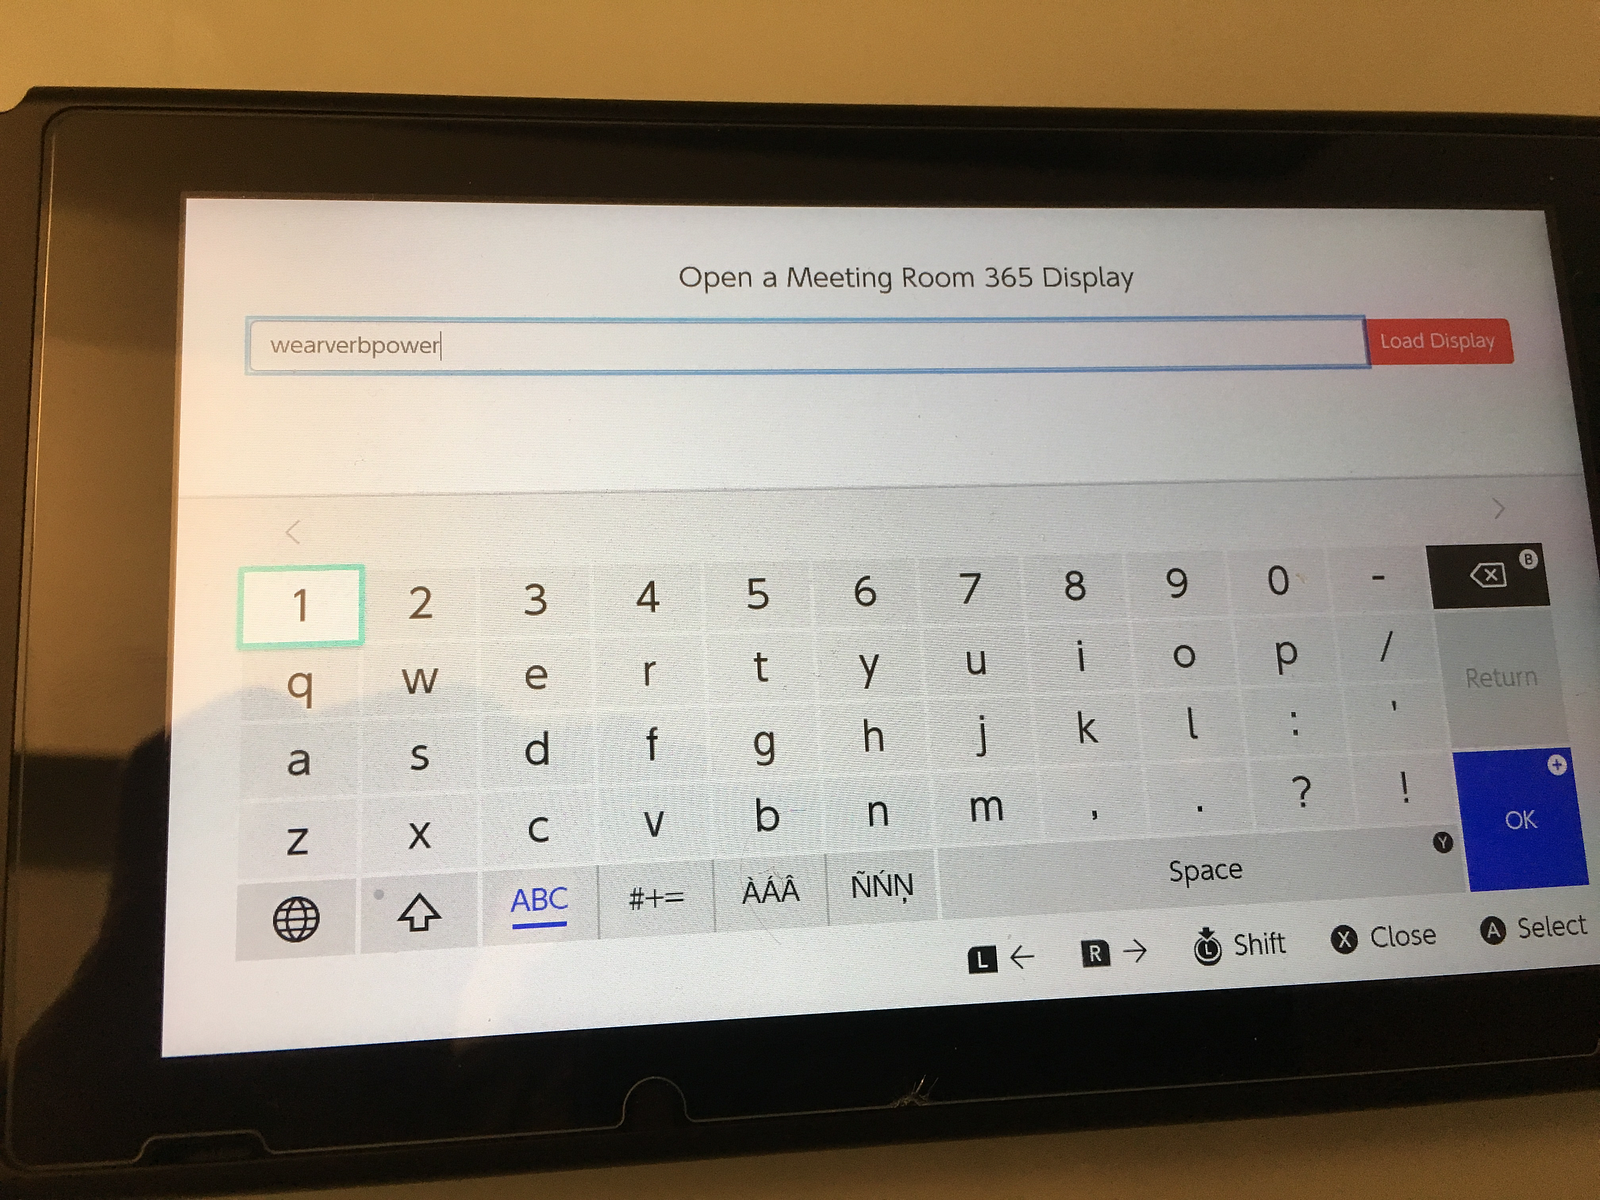
If you need the full URL:
https://meetingroom365.com/display?key=wearverbpowerTip: Use the touch-screen keyboard, not your joycons!
Press Load Display
Your display should now load!
Browse the Web
Maybe this is what you’re really here for: to see how easy it can be to browse the Web on your Nintendo Switch.
The good news is, you’re already there! Simply enter any URL you like, to start browsing the web on your switch. Note: there are limitations. Flash is not supported, and neither are most HTML5 video players, including Youtube. Also, there may be some issues with very large (or slow) web pages. But, other than that, it seems to be a very complete, standards-compliant, and up-to-date modern web browser!
How to get back to the Web Browser
In the future, if you want to get back to the web browser, just find your desired internet connection and press ‘Connect to Network’ again. You will load the same connecting screen, and then the web browser
What if you want to go back to normal mode?
Inevitably, you will want to revert these changes so you can access normal services, like Updates and the Nintendo eShop.
The simplest way to revert this change it to switch your DNS Settings back from Manual to Automatic. Your previous DNS IP will even be saved, to make it that much easier to get back to the web browser in the future.
More Realistic Considerations for using the Nintendo Switch as a Meeting Room Display
Display Cost
So, it’s not completely crazy to use a Nintendo Switch as a meeting room display. It could be really fun in a gaming-focused company, such as Nintendo.
But, at $299, a new Switch is a bit more expensive than alternatives, even the iPad Mini.
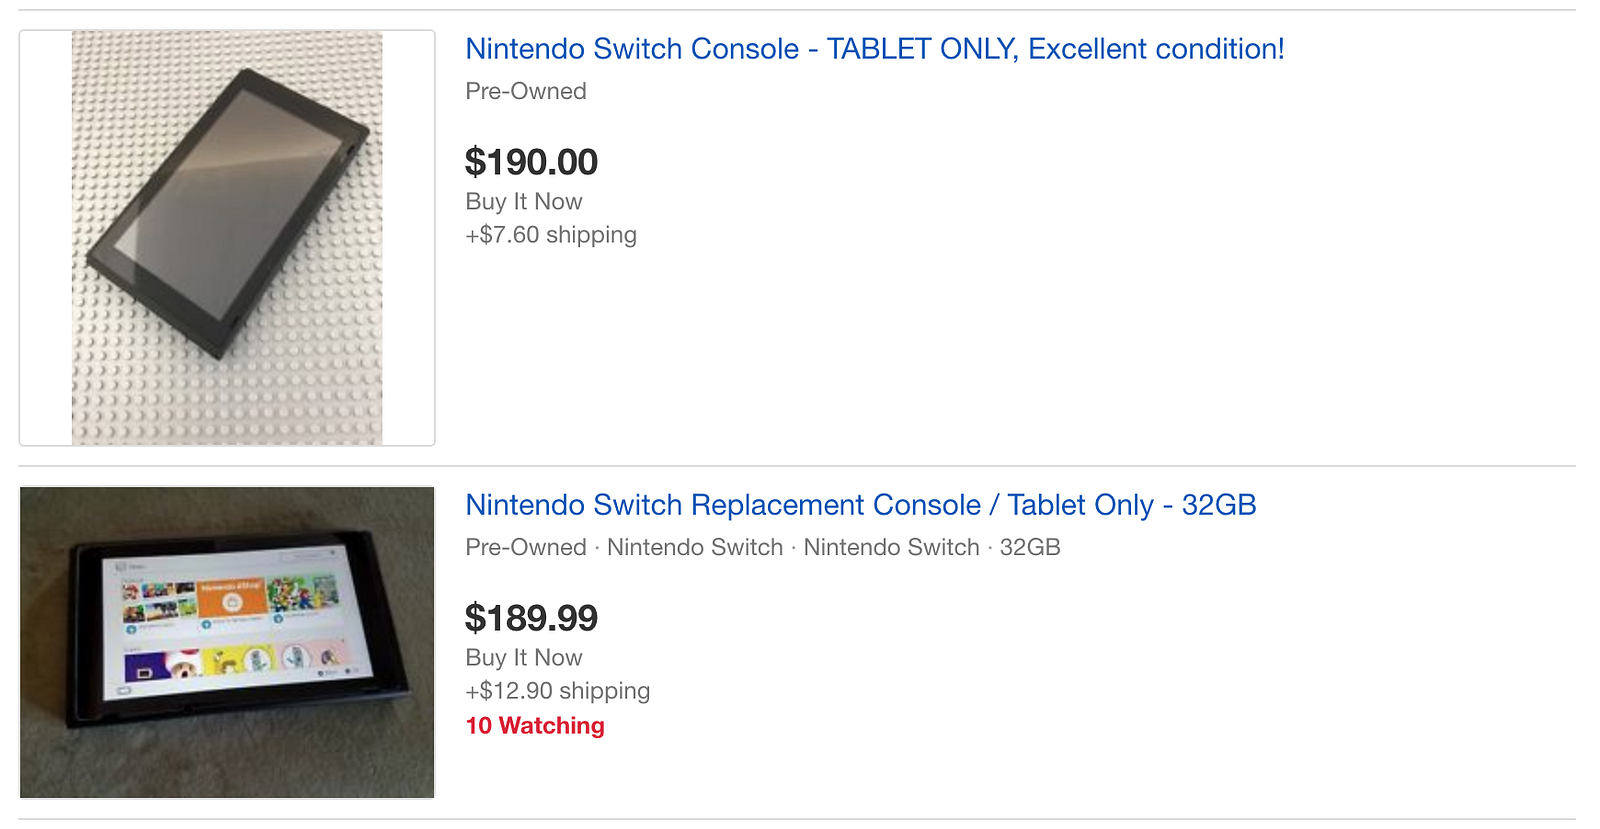
Ebay to the rescue! There is no shortage of tablet-only listings in the $160-$180 range (shipped). Throw in a USB-C charger ($8 new) and you’re all set.
Power Considerations
When setting up a Meeting Room display, Power is one of the most tricky concerns.
Officially, the Nintendo Switch AC power adapter is a cheap and simple solution, with a decent-length cable.
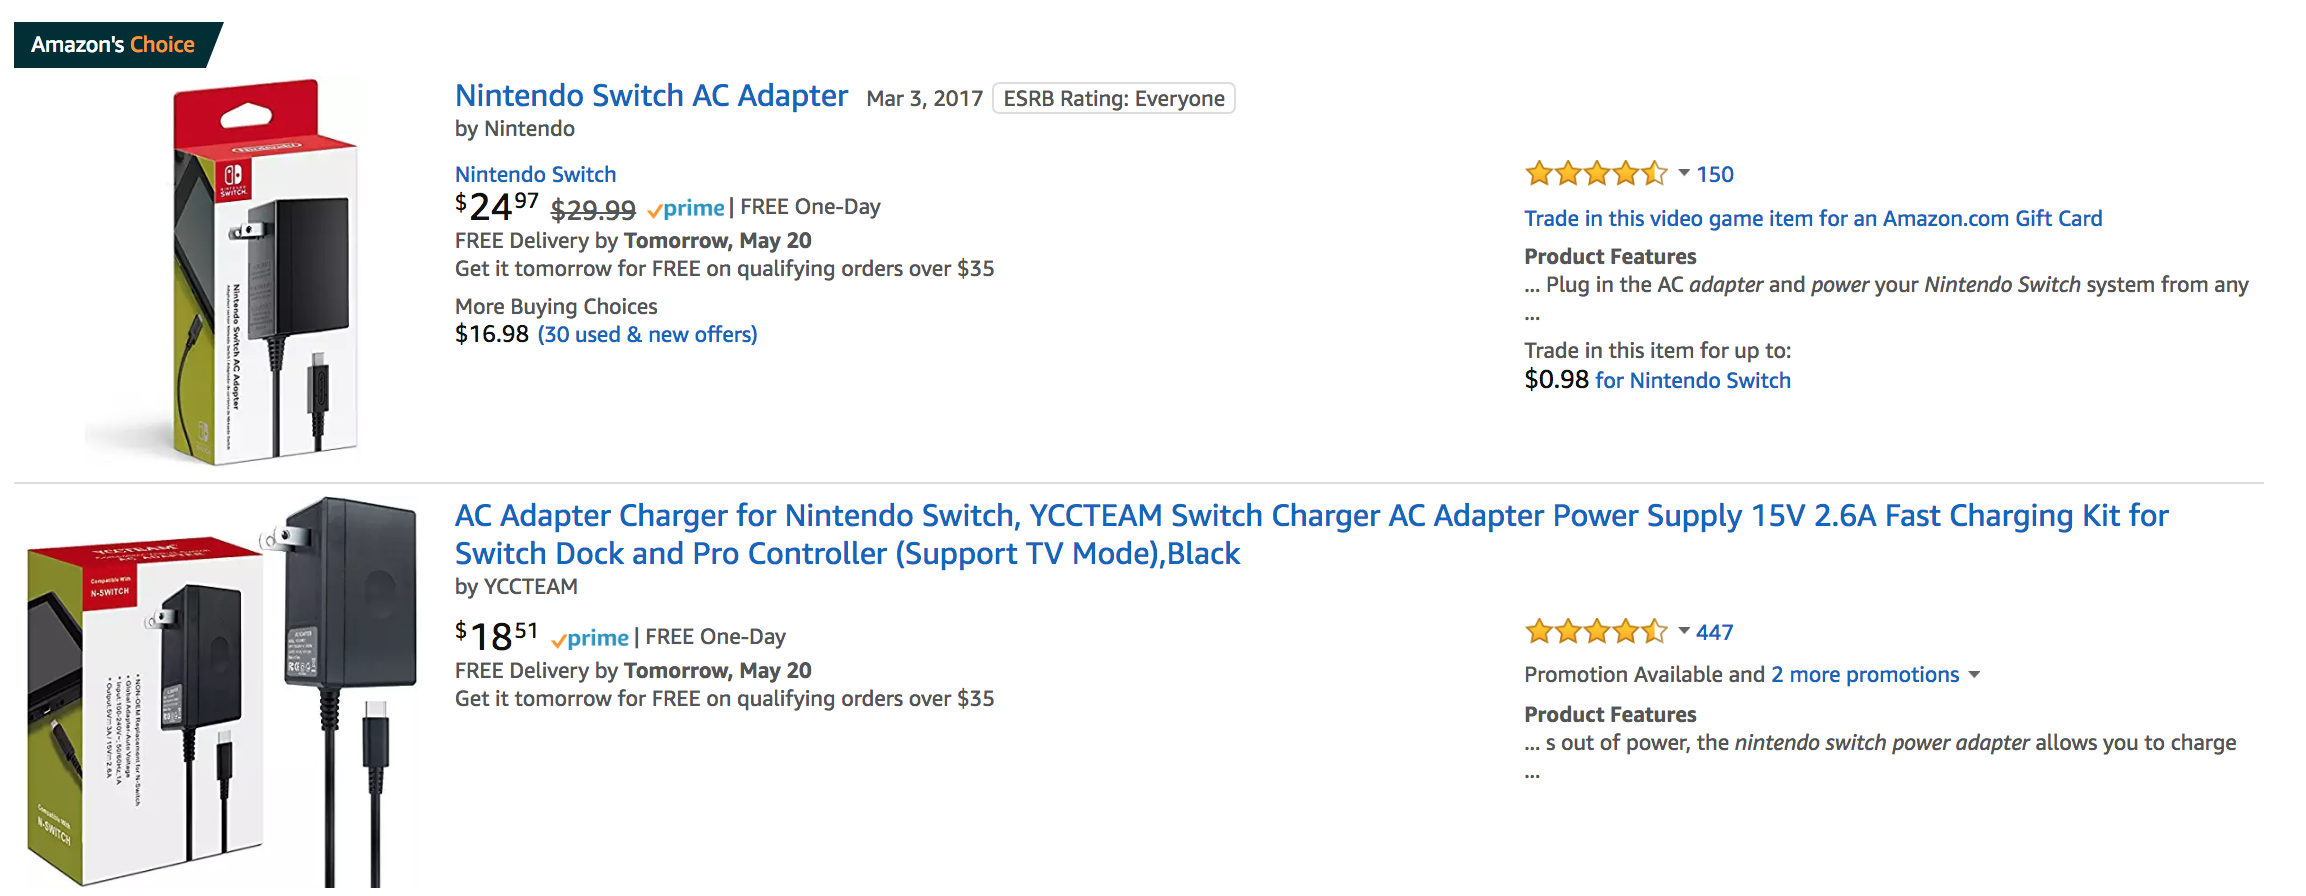
There are also third-party knockoffs from about $8.
However, Switch owners will be quick to point out, you need to find a Power adapter capable of 15V / 2.8A over USB-C. The standard 5V/1A adapters aren’t going to keep your Switch powered-on for long.
Mounting your displays
Once everything is set up, you’re ready to mount your displays.
For the Nintendo Switch, you may be happy placing it on a table or counter and utilizing the Kickstand!
However, for a standard display, you’re probably going to want to mount it to a wall.
You will either mount your display using 3m adhesive (fastest), or drywall / mounting screws.
For instance, the Koala Mount consists of two small, sturdy plastic brackets that gently cradle your device. Designed to be used with 3M Command Strips (included). The strips are rated to hold up to 5 lbs each (far more than any tablet). To remove, the strips can simply be stretched off without causing any damage.
Full Guides for Meeting Room 365
Interested in Setting up your own display using Meeting Room 365? We can support any tablet hardware you come up with, including older iPads, Android tablets, FireOS Devices, Windows & RT devices. We’ve even supported custom and proprietary display hardware. Reach out and let us know what you’re considering!