How to Create a Shared Calendar in Outlook


Setting up a new calendar in Microsoft Outlook is a great way to organize future meetings or scheduled tasks inside an organization.
However, sharing your own personal calendar directly with another user’s Outlook account doesn’t seem like a good idea.
Instead, we can create shared calendars, so two or more users have access to the information in that calendar from their own accounts.
This guide shows you how to create a shared Calendar in Outlook.
How to Create a Shared Calendar in Outlook
Creating shared calendars is a great way to have access to an important Calendar List that helps you organize events, check meeting room availability, and schedule conference calls smoothly.
To create a shared Calendar in Outlook from scratch, follow these steps recommended by Microsoft.
Step 1: Open Outlook Calendar View
Open Outlook and log into your Microsoft account. Select “Calendar View,” and proceed with the following step.
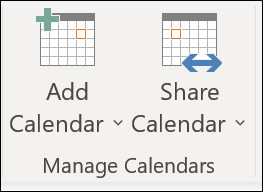
Step 2: Select “Add Calendar” and Click “Create New Blank Calendar”
After you open Calendar View, look for the button that says “Add Calendar.”
Click on it, and on the drop-down menu that Outlook displays, select “Create New Blank Calendar.”
Step 3: Edit the Calendar Folder
Here, you need to edit and manage the details of the main Calendar folder. These are the parameters that you need to change in the folder:
- Calendar Name: select a name for the shared calendar.
- Folder Contains: here, select the items that the folder contains (in this case, all the Calendar Items).
- Select Where to Place the Folder: it is possible to place the new shared calendar in different sections and folders of Outlook. For practical purposes, place the calendar under the Calendar section.

Step 4: Open the Calendar Folder and Select “Share Calendar” Icon
Once the calendar has been created, open it, and look for the Share Calendar icon - click on it.
Step 5: Select “Add…” and Add Names to the Calendar
Click the “Add” Button, and look for the “Add Users” dialog box.
Here, type in the email address or look for the name of the person you want to invite from your address book.
Click on the person you will share the calendar with, and proceed.
Step 6: In the Calendar Properties Dialog Box, Access “Permissions”
Go back to the Permissions Tab, and click on the name of one person to edit their permissions.
There are five different permission levels - some of them allow users to see everything related to a calendar (such as availability, subject, and meeting location), and others require invited users to request permission in order to edit/manage the calendar features.
The permissions levels are the following - select the one that suits you the most:
- Can view when I’m busy.
- Can view titles and locations.
- Can view all details.
- Can edit.
- Delegate.

Step 7: Click “Ok” And Wait for Recipients to Accept the Sharing Invitation
Once you have selected the person and the permissions for the new calendar, click “Ok.”
The recipients will receive an invitation to open, see, and (if necessary) edit the new shared calendar in Outlook.
How to Share a Static Copy of a Microsoft Outlook Calendar
It’s possible to share a calendar as a static copy (view only) via Outlook Online.
In case you don’t want others to edit and make changes to a calendar group in Outlook, you can share just the mail calendar with others - these are the steps you need to follow.
Step 1: Open the Calendar and Click “E-Mail Calendar”
Open Outlook, select the Calendar you want to share, and click on “E-mail Calendar.”

Step 2: Select the Calendar and the Date Range to Share
Outlook will ask you to select the Calendar and time period you want to share.
In the date range boxes, you can include a specific date range to share with others.

Step 3: Add the Email in the “To” Field And Send the Invite
Add the email of the recipients in the “To” field, and send the Calendar invite.
The invitation contains a see-only view of the shared calendar and iCalendar (.ics) file that recipients can download.
This iCalendar file can be opened in Outlook or another calendar program that supports this file format.
How to Create a Shared Calendar in a Shared Mailbox
Creating a shared calendar in a shared mailbox allows multiple users to have access to a single calendar without receiving invitations.
Since Other users will be able to access this calendar via the Shared Mailbox, it will be unnecessary to send invites, and everyone who has access to that mailbox will be able to open that calendar without further permissions.
- Open Outlook, click on “Add Calendar,” and set a New Blank Calendar.
- Fill in the Calendar details (names and items), and under the “Where to Place the Folder” menu, select the mailbox.
- Place the calendar in the mailbox, and save the changes. From now on, all users with access to that mailbox will see that calendar when they open Outlook.
How to Share a Calendar By Publishing It to a Web Page
If your organization server supports the World Wide Web Distributed Authoring and Versioning (WebDAV) protocol, you can share Outlook calendars with multiple users by publishing them to a web page.
You can learn if your web server supports WebDAV by asking your server administrator or Internet Service Provider.
- Click Calendar and go to the Home tab.
- Select Publish Online and click on “Publish to WebDAV Server” - this way, your calendar will be published on an Exchange server.
- Enter WebDAV server on the Location Box and click “OK.”
Why Can’t I Create a Shared Calendar In Outlook?
If you are receiving the “This calendar can't be shared” error message, then this is caused due to three possible reasons:
- The email address is invalid: type in the correct email address to fix this error.
- The email address is a Microsoft 365 Group: if the email address belongs to a Microsoft 365 Group, then the calendar invite will not be sent.
- The email belongs to an external user who isn't part of your organization: make sure that you are inviting recipients that are currently part of your organization.
Wrapping Up: Creating Shared Calendars in Microsoft Outlook
Sharing calendars in Microsoft Outlook is a great way to stay connected and check the schedule details of other members.
Remember that, in order to create a shared calendar in Outlook, there are four ways to do it:
- Create a Shared Calendar via Outlook by adding recipients.
- Share a static copy of an Outlook Calendar that users can only see without editing it.
- Create a Shared Calendar inside a single mailbox.And publish a Shared Calendar on a web page (only if you have enough permissions).