Using Enable-InboxRule in Powershell: All You Need To Know

In the world of email management, Inbox rules play a crucial role in automating the way messages are processed in user mailboxes.
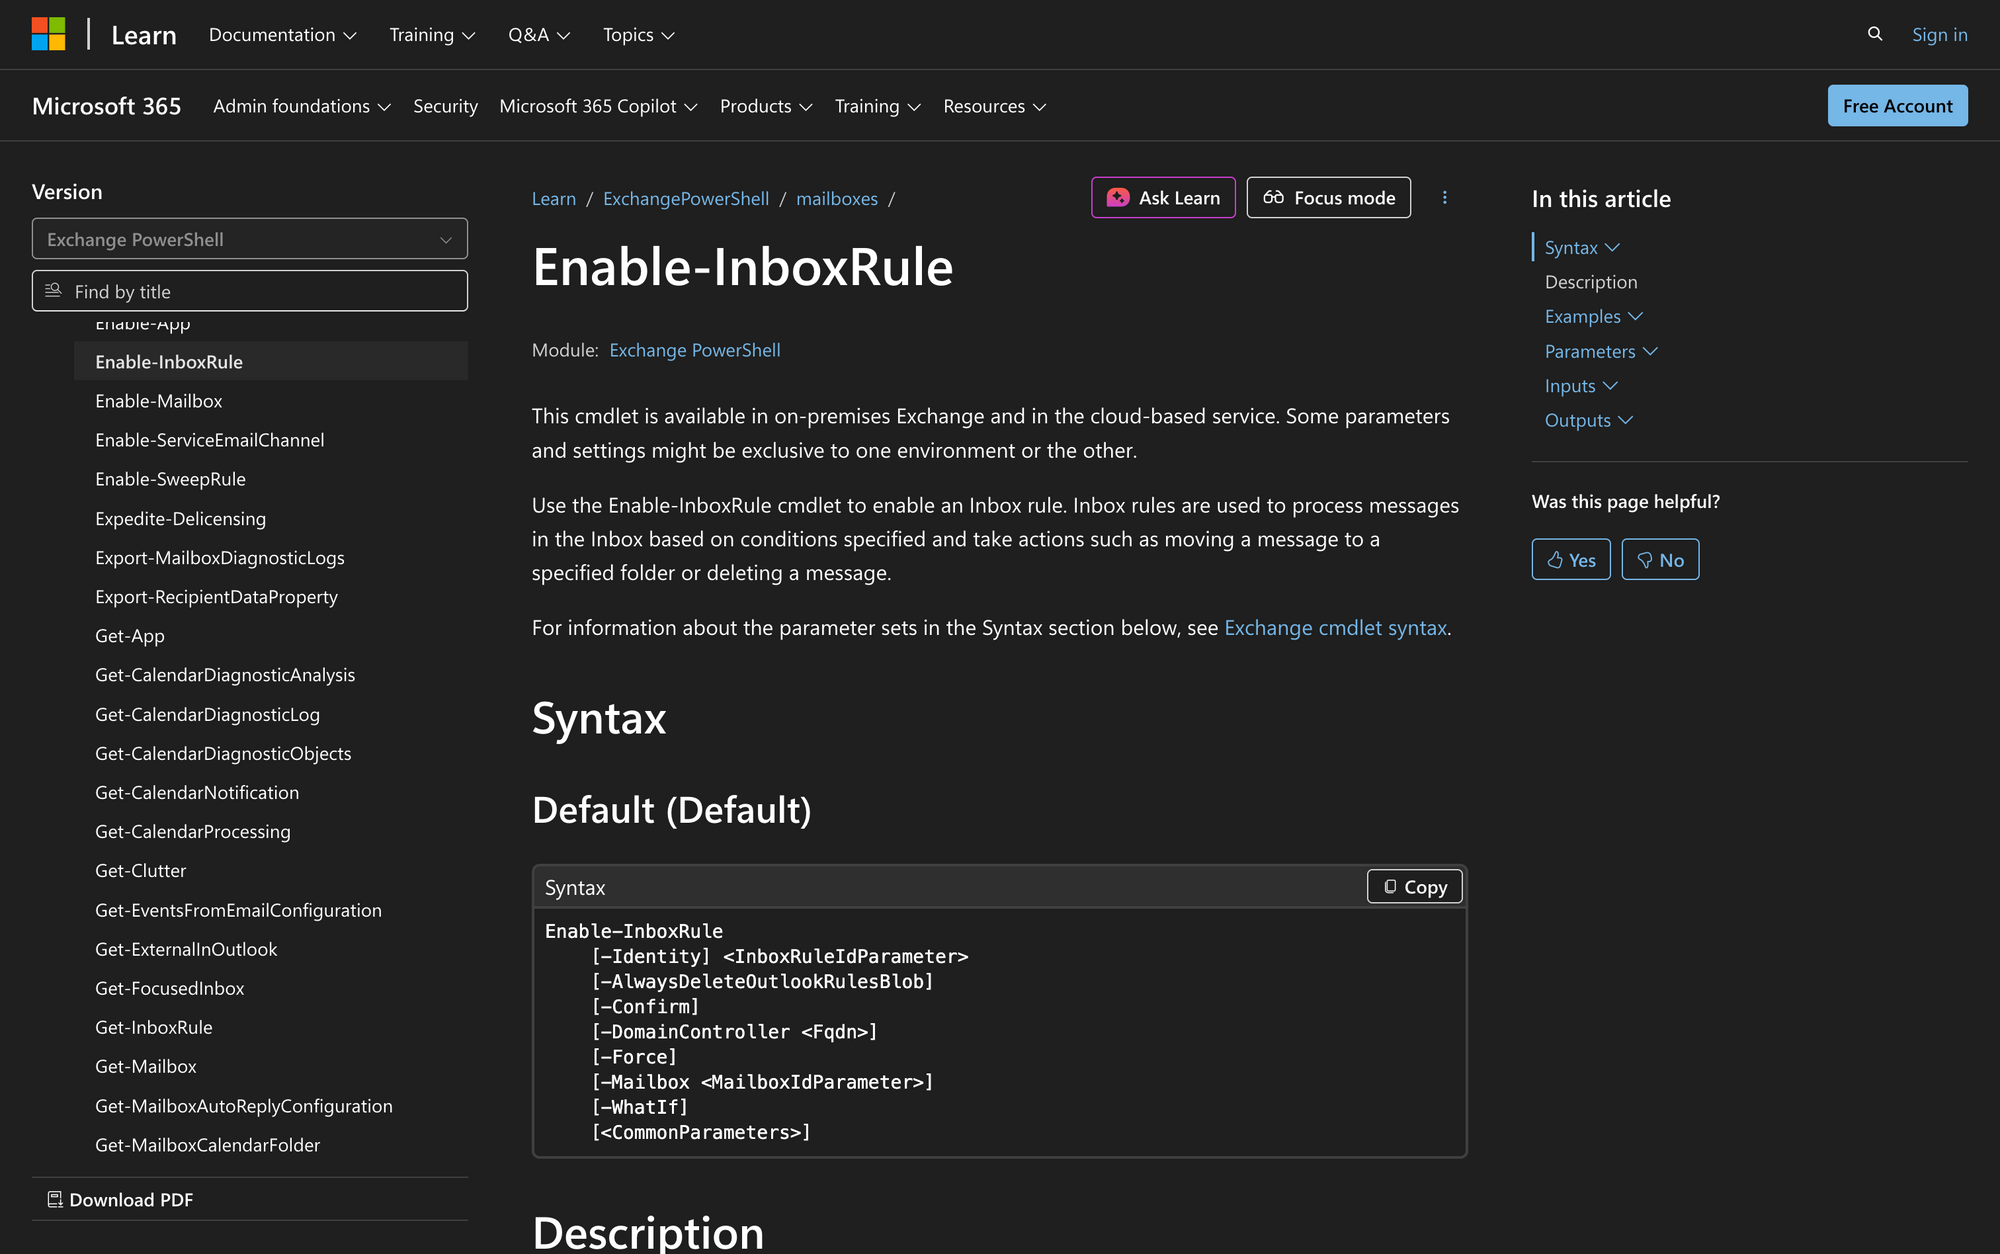
The Enable-InboxRule cmdlet in PowerShell is a powerful tool that enables administrators to activate existing Inbox rules for users in their organization. This cmdlet is available in both on-premises Exchange environments and Exchange Online, providing flexibility for various administrative scenarios. Understanding how to effectively use this cmdlet can significantly streamline email management and enhance productivity within an organization.
What is the Enable-InboxRule Cmdlet?
The Enable-InboxRule cmdlet is used to enable a specific Inbox rule within a user’s mailbox. When Inbox rules are created, they can either be enabled or disabled based on the user's preferences or organizational policies. By enabling a rule, administrators ensure that specified actions are applied to incoming messages according to the defined conditions.
For example, rules can automatically move messages from certain senders into designated folders, delete unwanted emails, or even forward essential emails to another address.
Using this cmdlet can be particularly useful in scenarios where a user may have created rules that are temporarily disabled, or when an administrator needs to enforce specific email management practices across user mailboxes. For example, an organization may want to enable a rule that directs emails from high-priority clients to a separate folder, ensuring they are easily accessible.
For administrators managing broader mailbox configurations, you may also find the Set-MailboxPlan cmdlet guide helpful for applying mailbox plans and standardizing settings across users.
Syntax
The official syntax for the Enable-InboxRule cmdlet is as follows:
Enable-InboxRule
[-Identity] <InboxRuleIdParameter>
[-AlwaysDeleteOutlookRulesBlob]
[-Confirm]
[-DomainController <Fqdn>]
[-Force]
[-Mailbox <MailboxIdParameter>]
[-WhatIf]
[<CommonParameters>]
Parameters
- Identity - Specifies the Inbox rule that you want to enable. You can use any value that uniquely identifies the rule, including the rule name or the RuleIdentity property. Valid examples include the rule name, the numeric RuleIdentity value, or compound formats such as MailboxAliasRuleIdentity (Exchange Online) and MailboxCanonicalNameRuleIdentity (on-premises Exchange). These are examples, not required formats.
- AlwaysDeleteOutlookRulesBlob - Hides a warning message when modifying Inbox rules using Outlook on the web or Exchange PowerShell; no value needs to be specified.
- Confirm – Determines whether to show a confirmation prompt before executing the cmdlet.
- DomainController - (On-premises only) Specifies the domain controller used by this cmdlet to read or write data to Active Directory.
- Force - Suppresses warning or confirmation messages, allowing for programmatic execution without prompts.
- Mailbox - Specifies the mailbox that contains the Inbox rule. Valid identifiers include name, alias, email address, Distinguished Name (DN), Canonical DN, DomainUsername, GUID, LegacyExchangeDN, SamAccountName, user ID, or user principal name (UPN).
- WhatIf - Simulates the command's actions, showing potential outcomes without applying any changes.
Important: Enable-InboxRule can only manage server-side Inbox rules. Client-side rules that require the Outlook client to run cannot be enabled or modified using Exchange PowerShell.
Practical Uses
1. Enabling Rules for High-Priority Emails
In many organizations, it is critical to ensure that emails from specific clients or partners are easily accessible. By using Enable-InboxRule, administrators can enable rules designed to filter and categorize these important messages.
For example, if a user has a rule that moves emails from a key client into a designated folder, enabling this rule ensures that the user does not miss important communications.
2. Automating Response to Spam
Another practical use of the Enable-InboxRule cmdlet is in managing spam. Organizations often create rules that automatically send suspected spam emails to the Junk Email folder. By enabling these rules, administrators can help users manage unwanted emails more effectively, reducing clutter in their inboxes and improving overall productivity.
3. Implementing Organizational Email Policies
In larger organizations, email management policies may dictate how certain types of emails should be handled. For instance, a company may have rules that require emails from external addresses to be flagged for review.
By enabling these rules via PowerShell, administrators can ensure compliance with the organization's email policies, maintaining both security and efficiency.
Prerequisites
Before using the Enable-InboxRule cmdlet, ensure the following requirements are met:
- You must be assigned the appropriate Exchange role permissions (for example, Organization Management or an equivalent role) to run this cmdlet.
- The cmdlet is available in Exchange Server 2010, 2013, 2016, 2019, and Exchange Online.
- Familiarity with the Exchange Management Shell or Exchange Online PowerShell module is recommended.
How to Use Enable-InboxRule: 6 Practical Uses
The following examples illustrate how to effectively use the Enable-InboxRule cmdlet in different scenarios. Each example demonstrates a specific administrative task that can enhance email management within your organization.
1. Enable a Specific Inbox Rule
Command:
Enable-InboxRule -Identity "User11234567890123456789" -Mailbox "User1"
This command enables the Inbox rule identified by its RuleIdentity value for the specified user, User1. Using the RuleIdentity value avoids ambiguity when multiple rules share the same name.
This is particularly beneficial for reducing spam and ensuring that users can focus on more important messages.
Command:
Enable-InboxRule -Identity "Move To Junk Mail" -Mailbox "User1"
This example uses the rule name as the Identity value. This works only if the rule name is unique within the mailbox.
Note: Using the rule name as the Identity value works only if the rule name is unique within the mailbox. If multiple rules share the same name, you must use the RuleIdentity value.
2. Enable a Rule for a Shared Mailbox
Command:
Enable-InboxRule -Identity "Forward to Team" -Mailbox "[email protected]"
In this example, the command enables the Inbox rule "Forward to Team" for a shared mailbox. This rule could be set up to automatically forward relevant emails received by the shared mailbox to a designated team email address. This ensures that critical communications are promptly shared among team members, enhancing collaboration and response times.
3. Enable a Rule to Categorize Emails
Command:
Enable-InboxRule -Identity "Important Clients" -Mailbox "[email protected]"
This command enables the Inbox rule "Important Clients" for James' mailbox. This rule may categorize emails from specific clients as "High Priority," allowing James to easily identify and respond to important messages. By enabling this rule, administrators can assist users in managing their inboxes more effectively, ensuring that high-priority emails are not overlooked.
4. Enable Multiple Rules for a User
Command:
Enable-InboxRule -Identity "Client Follow-Up" -Mailbox "[email protected]"
Using this command, administrators can enable the "Client Follow-Up" rule for Simon’s mailbox. This rule might be designed to remind Simon to follow up on emails from clients after a certain period.
By activating this rule, organizations can ensure that their employees maintain consistent communication with clients, fostering better relationships and customer satisfaction.
5. Enable a Rule for Forwarding Emails
Command:
Enable-InboxRule -Identity "Forward to Personal" -Mailbox "[email protected]"
This command enables the rule "Forward to Personal" for James. While it is essential to be cautious with forwarding rules to mitigate security risks, enabling this rule can provide users with flexibility in managing their communications. Ensure compliance with organizational policies when using such rules.
6. Enable a Rule for Sorting Emails by Importance
Command:
Enable-InboxRule -Identity "Sort by Importance" -Mailbox "[email protected]"
In this example, the command enables the Inbox rule "Sort by Importance" for Simon's mailbox. This rule could automatically categorize incoming emails based on their importance levels, helping Simon prioritize his responses.
By enabling such rules, administrators can improve the effectiveness of email management strategies within the organization.
Final Note
The Enable-InboxRule cmdlet is a valuable tool for administrators managing email systems in Exchange Server and Exchange Online. By enabling specific Inbox rules, organizations can enhance email management practices, ensuring that users can efficiently process their incoming messages. Understanding how to use this cmdlet effectively let administrators to create a more organized and productive email environment, ultimately benefiting the entire organization.
Whether dealing with spam, high-priority emails, or shared mailboxes, the flexibility offered by the Enable-InboxRule cmdlet can greatly improve the email experience for both users and administrators alike.